

Regarding ‘ARCore’ which is AR library released by Google, last time I explained about the beginning part of setting for ‘Cloud Anchors’ which is one sample program released from ARCore 1.2 or later version.
[Link: I tried ‘Cloud Anchors’ (A sample of ‘ARCore’) Part1]
The ‘Cloud Anchors’ is a library to realize AR multiplayer’s app sharing same AR environment with some devices. It means that due to realize same AR environment with some players, it provides a function to share the position information of real space with some mobile devices.
By following movie which is not this sample program, but you can understand what you can realize by Cloud Anchors’ technology.
[3. Set up in Unity]
3.1. Change platform for Android
Let’s start to set up the sample program of Cloud Anchor in Unity editor.
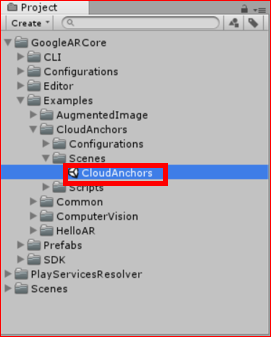
Firstly, double click ‘CloudAnchors’ scene which is located at following path in Project view, then open ‘CloudAnchors’ scene.
GoogleARCore > Examples > CloudAnchors > Scenes > CloudAnchors
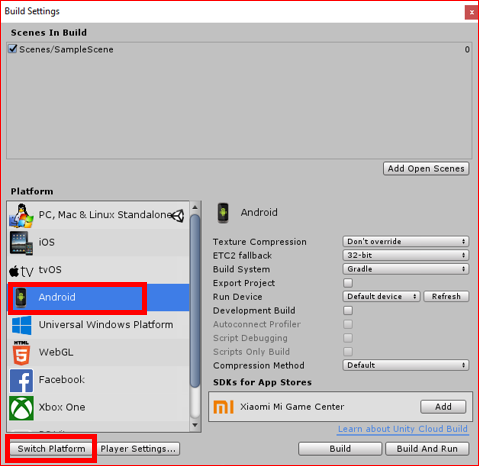
When you just create new project in Unity, normally, I think the platform is ‘PC, Mac & Linux Standalone’. Here, we’ll change the platform to Android.
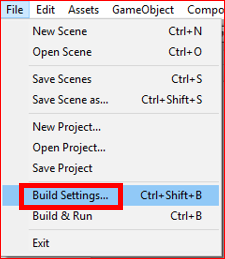
Open ‘Build Settings’ screen by clicking ‘File > Build Settings…’.
Chose ‘Android’ in Platform, click ‘Switch Platform’. Changing platform sometimes take for long time.
3.2. Set up Player Settings
Click ‘Player Settings…’ to make ‘Player Settings’ screen show in Inspector view.
 <Image>
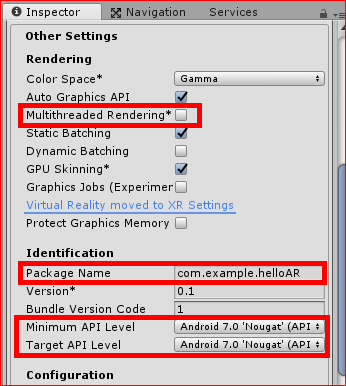
Then, change the ‘Player Settings’ in Inspector view like followings.
[Other Settings]
- ‘Multithreaded Rendering*’: Uncheck
- ‘Package Name’: Input any name you like, for example, like following image.
- ‘Minimum API Level’: Select Android 7.0 or later
- ‘Target API Level’: Select Android 7.0 or later
[XR Settings]
- ‘ARCore Supported’: Check

3.3. Set up Project Settings
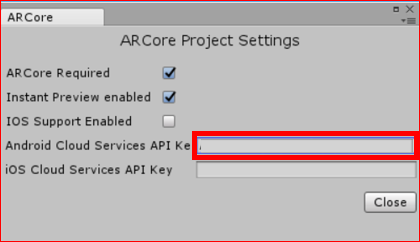
Open ‘ARCore Project Settings’ screen by clicking ‘Edit > Project Settings > ARCore’.
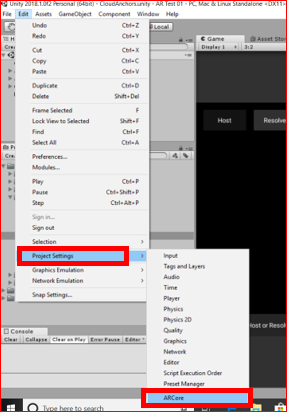
Input API Key created earlier into ‘Android Cloud Services API Key’ field.
Drag and drop the scene of CloudAnchors in Project view into ‘Scenes In Build’ field in Build Settings screen.
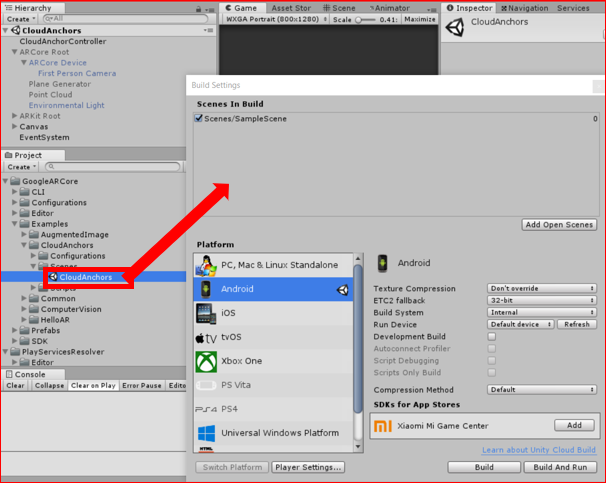
Click ‘Build’ or ‘Build And Run’ to run the Build. Any name is ok for the saving file.

[4. Run on my mobile devices]
4.1. Run as Host side
To test this function, you need 2 mobile devices. Firstly, need to install this sample app just now build to the 2 devices.
Open the app just installed on the 1st mobile device as ‘Host’ device. The screen is like following image.
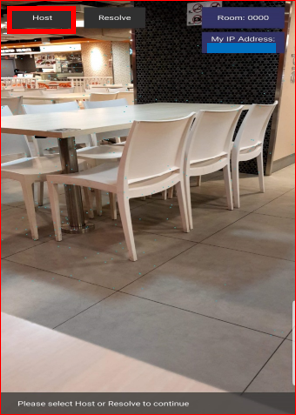
Tap ‘Host’ button on the top of the screen, and ‘The room code is now available. Please place an anchor to host, press Cancel to Exit‘ message will be appeared on the bottom.
On the screen, some meshes will be appeared at the locations that the app identified those as plates. Tap any location which is shown the mesh.
 <Image>
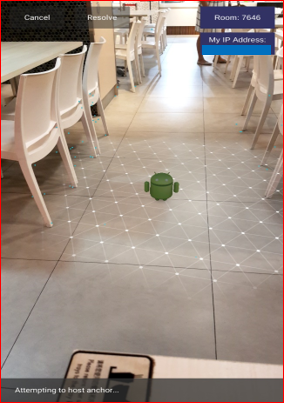
‘Attempting to host anchor ’ message will be shown on the bottom, and Google character Andy will be appeared at the location you tapped on the screen. In this timing, the position information is been saving as Anchor to share the real space’s position into Google Cloud.
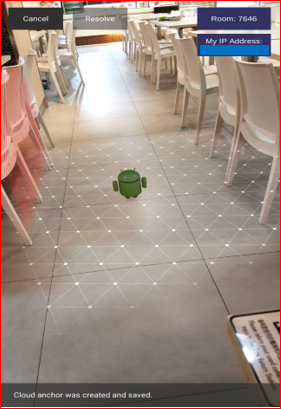
If ‘Cloud Anchor was created and saved.’ message appeared on the bottom, it’s ok. You can try to get the position information of the anchor by another device.
4.2. Run as Remote Client
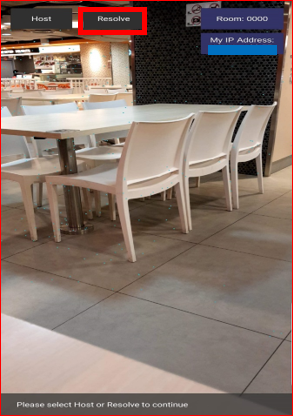
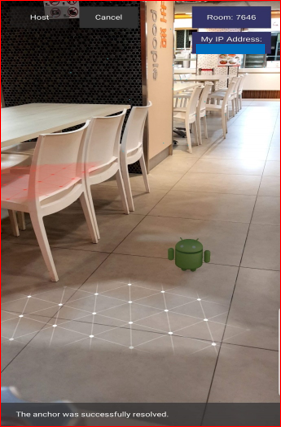
Open the app just installed on the 2nd mobile device as remote client device. Tap ‘Resolve’ button on the top of the screen.
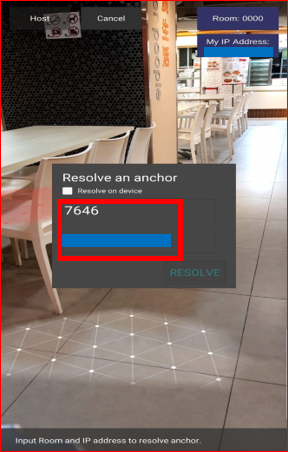
Input ‘Room’ and ‘IP Address’ which are created Host side.
 <Image>
If Andy appeared at the position which is set as anchor position by Host side, it’s worked successfully. It means that those 2 devices identified same real space’s position each other.
Eventually, ‘Cloud Anchors’ just provide anchor’s system to share same position in real space with some devices very easily. Therefore, if you want to create multiplayers’ AR game, you need to realize multiplayer parts by yourselves.
[Original Japanese Site: http://blog.lab7.biz/archives/11674730.html]