
Last time, I explained how to set up ‘Augmented Image’ to display AR objects with 2D images as markers for ARCore SDK of Android.
[ The setting way of ‘Augmented Image’ of ‘ARCore’ Part1 ]
This time, I will explain how to change the Marker Image and how to change the 3D objects displayed as the AR objects to create your own AR application.
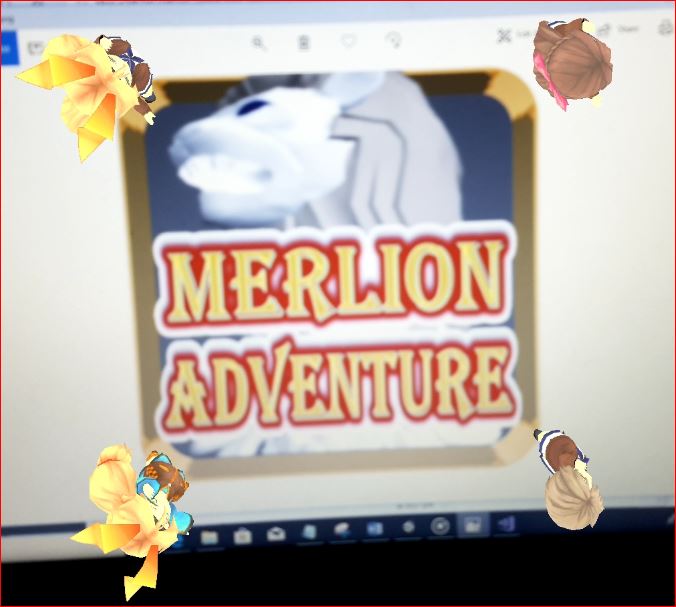
(The above image is the final image after changed 3D objects.)
[4. Change Marker image]
4.1. Confirm Maker image
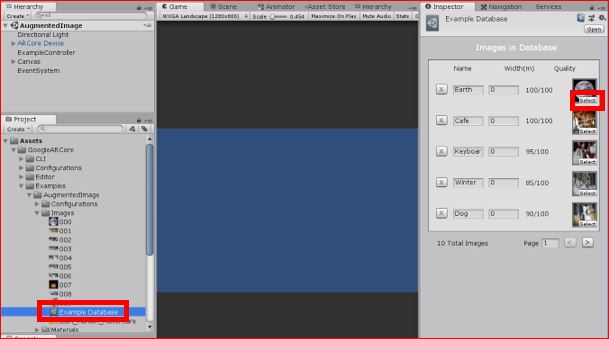
First of all, let’s check the Marker Images registered as a sample. Open the following folder from Project view.
Assets > GoogleARCore > Example > AugmentedImage > Images
There is a Database called ‘Example Database‘, so click on it.
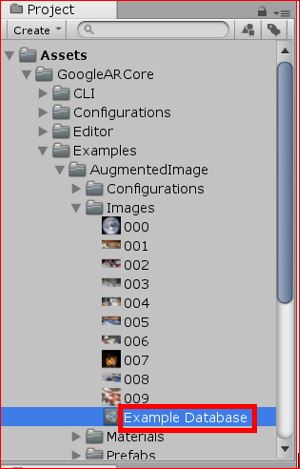
The images registered in the Database of this sample are displayed in Inspector view. The image of the earth I used last time is registered in the first line.
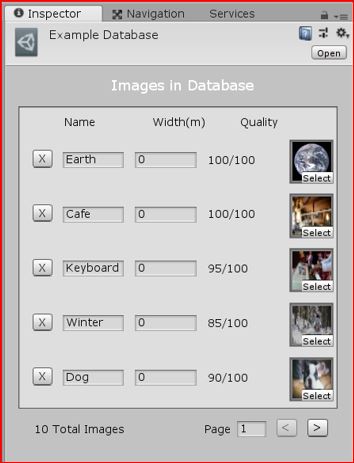
As a sample, 10 images are registered. (1000 images can be registered in this Database.)
4.2. Change Marker image
Let’s register your new image in this Database. Although it can be newly registered, as an easiest method here, I’ll introduce changing the existing image to my own image.
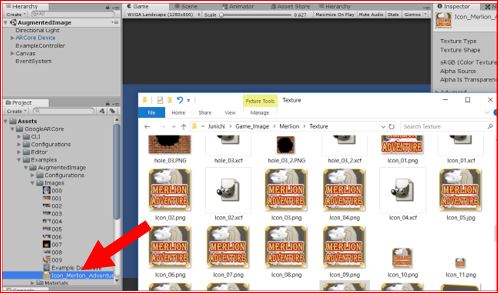
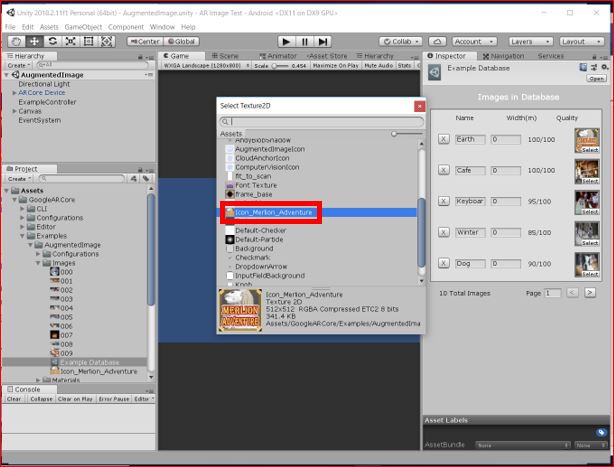
First of all, copy your own image to Unity as preparation. Drag and drop your image from the file explorer to the folder where the sample images are saved in Project view of Unity editor.
(I selected an icon image of the game application ‘Merlion Adventure’ released from Lab7. By the way, I am currently developing ‘Merlion Adventure 2’!)
According to the official site of ARCore, the marker image have to be followed to the specifications below.
- Augmented Images supports PNG and JPEG file formats. For JPEG files, avoid heavy compression for best performance.
- Detection is solely based on points of high contrast, so both color and black/white images are detected, regardless of whether a color or black/white reference image is used.
- The image’s resolution should be at least 300 x 300 pixels.
- Avoid images with sparse and repetitive features.
- A good reference image is hard to spot with the human eye. Use the arcoreimg tool to get a score between 0 and 100 for each image. We recommend a score of at least 75.
Then let’s try to change the marker image of the Earth on the first line of ‘Example Database’ on Inspector view. Click ‘Select’ in the lower right corner of the image to display the images in Unity editor.
That’s all for the setting. Let’s try to make the app to recognize a new your image.
4.3. Try new Maker image
As we did last time for a mobile phone test, connect the Android device with a USB cable. Click ‘Build And Run’ to run the build and application installation. In that time, system will ask you to input file name, then it’s ok to input any file names.
After finished the installation, the application will be launched on the mobile phone. The application will display ‘Fit the image you’re scanning’ and begin looking for a marker image.
I tried to make it to directly recognize the PC screen again. The application recognized it easily.

[5. Change displayed 3D objects]
5.1. Register new Database
Next, let’s change to display new 3D objects when recognizing the marker image. Taking a simpler method again, I will use existing samples as much as possible.
However, regarding Database, let’s register it newly. (If you want to use an existing Database, skip here.)
Right click on your own marker image (Folder: Assets > GoogleARCore > Example > AugmentedImage > Images) that you copied to Project view earlier.
From there, follow the menu below and click AugmentedImageDatabase.
Create > GoogleARCore > AugmentedImageDatabase
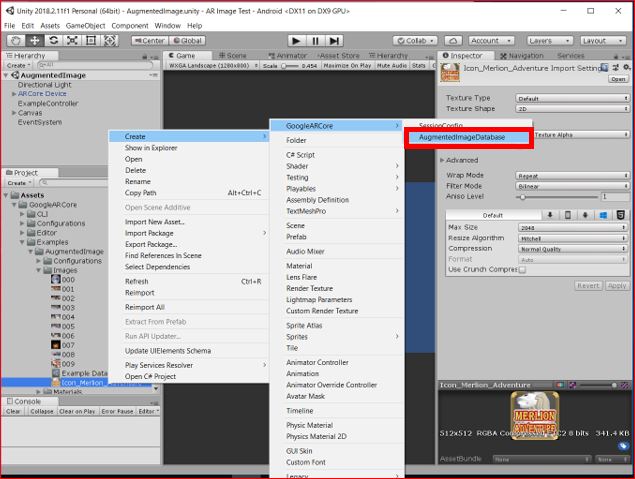
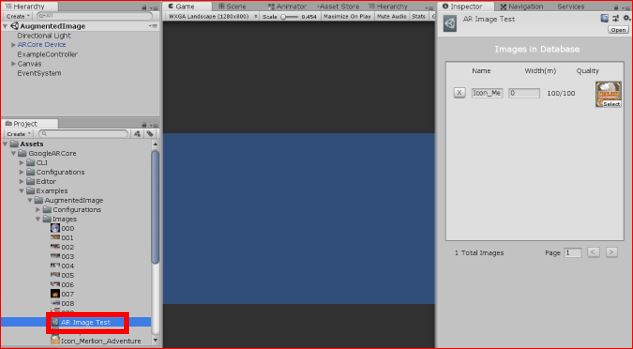
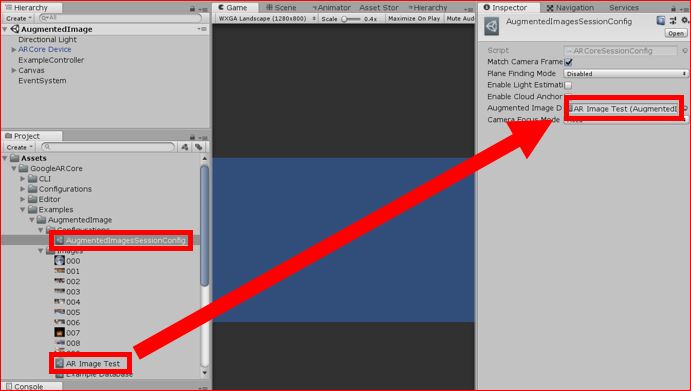
You can create a new Database, and change the name on Project view. I changed it to “AR Image Test” here.
Next, click AugmentedImagesSessionConfig in the following folder on Project view.
Assets > GoogleARCore > Examples > AugmentedImage > Configurations > AugmentedImagesSessionConfig
Then, drag and drop the Database created earlier into ‘Augmented Image Database’ on Inspector view.
5.2. Confirm related C# scripts
This time as I said, trying to make it easier, so I will not modify any scripts. However, let’s just review some C # scripts related to Augmented Image. (Of course it is an option.)
There are two C # scripts under Assets > GoogleARCore > Examples > AugmentedImage > Scripts on Project view. Let’s check those.
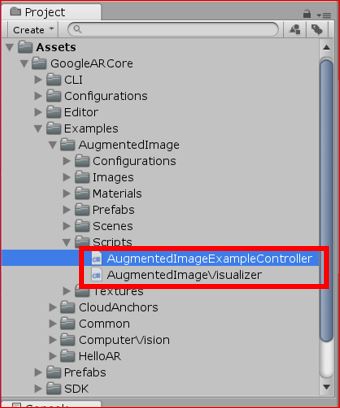
【AugmentedImageExampleController】
This is a script attached to an object on Hierarchy view.
【AugmentedImageVisualizer】
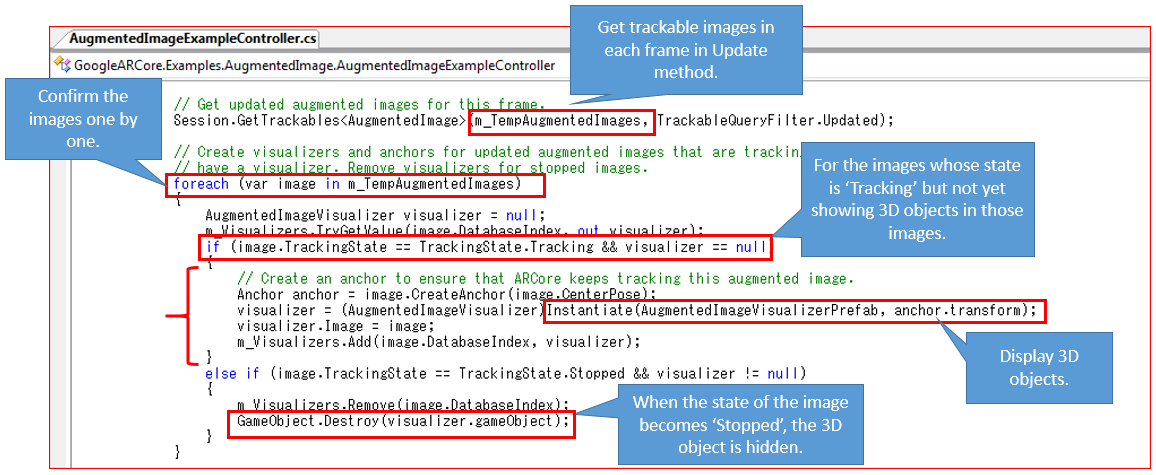
Since it is attached to the 3D object Prefab, after creating the prefab, the ‘Update’ method is called in every frame.

5.3. Register new 3D objects
Let’s realize the display of the new 3D object with a simpler work again. Therefore, I will not modify any scripts, just try to adjust existing samples on Unity editor.
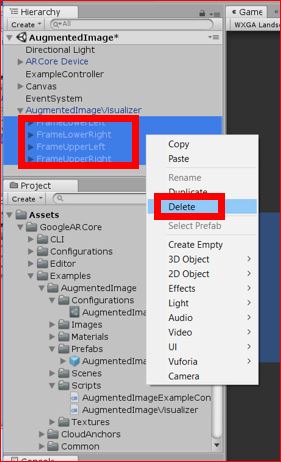
Firstly, check the Prefab currently displayed. There is a Prefab called ‘AugmentedImageVisualizer’ under Assets > GoogleARCore > Examples > AugmentedImage > Prefabs folder on Project view.
Since this Prefab has been called from the sample program, let’s replace this Prefab. Drag and drop this Prefab into Hierarchy view.

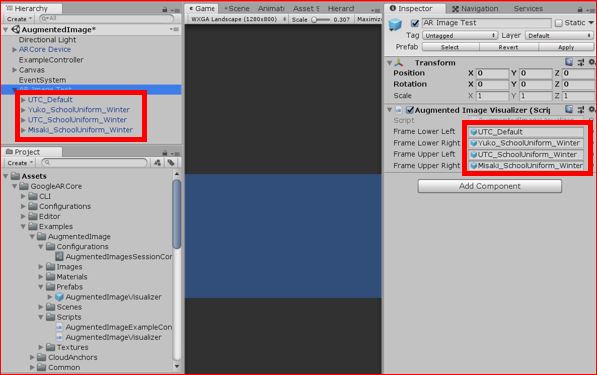
In Inspector view, four game objects are registered.
These four game objects are displayed like picture frames at the four corners of the recognized marker image.
In Hierarchy view, there are the child objects of the Prefab we are looking at. Delete those four game objects by the right-click menu.
Then make another 3D object of yourself as a child object of Prefab ‘AugmentedImageVisualizer’ in the same way. Then register them in the Inspector view.
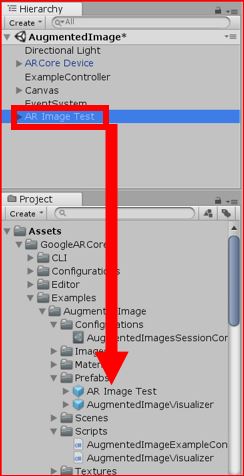
Change the name of this Prefab. I chose ‘AR Image Test’ here. Then, drag and drop this from Hierarchy view to Project view and make a new Prefab.
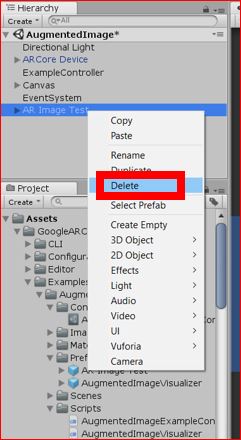
After making it as Prefab, it is not necessary on Hierarchy view anymore, so delete it by the right click menu.
Next, click ‘Examplecontroller’ on Hierarchy view to display ‘Augmented Image Example Controller’ component on Inspector view. Drag and drop the Prefab you created from Project view into ‘Augmented Image Visualizer’ item located there.

The setting has been completed. Let’s try it by a mobile phone. Connect the Android device with the USB cable. Click “Build And Run” to run the build and the application installation.
I tried to recognize the image on the PC screen directly as before. The 3D object registered by myself was appeared instead of the original picture frames.

Like this, ‘Augmented Image’ is a function to register and recognize marker images.
This makes it easy to create an application that just displays 3D objects after marker image recognition. However, that kind of things are not so uncommon now, so we need to more consider about what we can realize using this.
[ Original Japanese Site: http://blog.lab7.biz/archives/14720238.html ]