
Recently, many sessions of VR and AR are held in Unite and some events. I’m also developing AR game app using ARCore which is Google’s platform for building AR app for Android.
Therefore, this time, I’ll introduce how to set up the most basic sample ‘HelloAR’ which is included in ARCore SDK. When you create AR app by yourself, you can study about ARCore by this sample. And by modifying this sample, you can also create yourselves’ AR app easily.
[Google’s explanation: https://developers.google.com/ar/develop/unity/quickstart-android]
[Overview of the operation steps]
1. Download ‘ARCore SDK for Unity’ and Import
1.1. Download ‘ARCore SDK for Unity’
1.2. Import ‘ARCore SDK for Unity’
1.3. Confirm the folder structure (Option)
2. Set up in Unity
2.1. Switch the platform to Android
2.2. Set up Player Settings
3. Run on your mobile phone
4. Change Google character Andy to another
4.1. Prepare another 3D model
4.2. Change to another 3D model
4.3. Run on your mobile phone
[Used software version]
– Wiindows10
– Unity 2017.4 (Need to install JDK and Android Studio beforehand)
– ARCore SDK for Unity v1.4.0
[1. Download ‘ARCore SDK for Unity’ and Import]
1.1. Download ‘ARCore SDK for Unity’
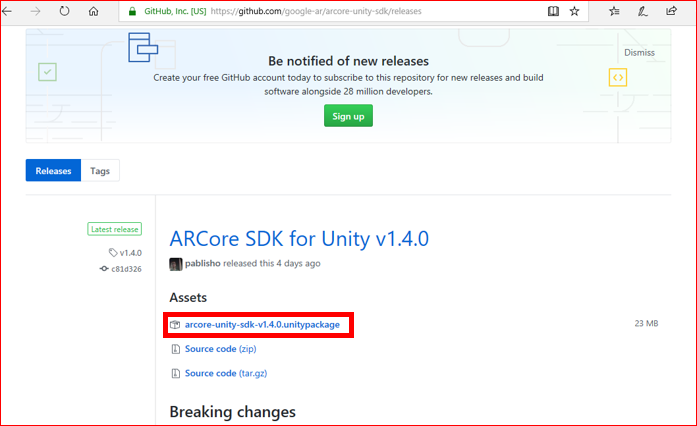
Firstly, download latest ‘ARCore SDK for Unity’ from GitHub. You can download the Unity Package from following link.
[Link: https://github.com/google-ar/arcore-unity-sdk/releases]
In this case ‘ARCore SDK for Unity v1.4.0’, click ‘accore-unity-sdk-v1.4.0.unitypackage’ to download. (Depending on version of the Unity Package, the screen will be changed.)
1.2. Import ‘ARCore SDK for Unity’
Next, open Unity Editor.
Import the Unity Package which is downloaded just now.
‘Assets > Import Package > Custom Package…’.

Confirm selected all, click ‘Import’ button. Importing the package will be started.
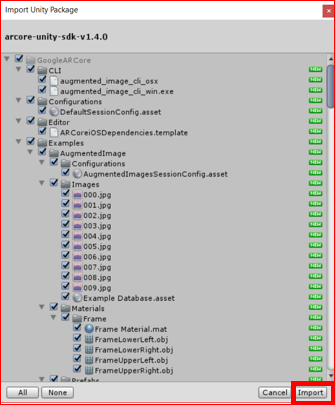
After completion of the importing, you can start to use ARCore.
1.3. Confirm the folder structure (Option)
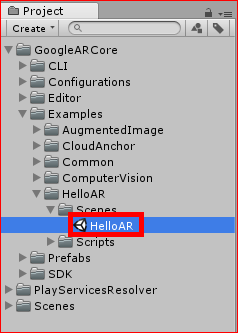
Here, let’s see the folder structure of ARCore SDK for Unity.
- GoogleARCore > Examples: You can see some samples of this ARCore SDK.
- GoogleARCore > Examples > HelloAR: You can see a scene and a script for HelloAR sample.
- GoogleARCore > Examples > Common: You can see some prefabs and scripts which are used for some samples in common.
[2. Set up in Unity]
2.1. Switch the platform to Android
Let’s start to set up the sample HelloAR in Unity.
Firstly, by double clicking scene ‘HelloAR’, open HelloAR scene.
GoogleARCore > Examples > HelloAR > Scenes > HelloAR
Normally, I think when open new Unity project, the platform setting is ‘PC, Mac & Linux Standalone’. However, ARCore is for Android, you need to switch the platform to Android.
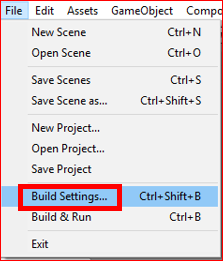
Open ‘Build Settings’ screen by ‘File > Build Settings…’.
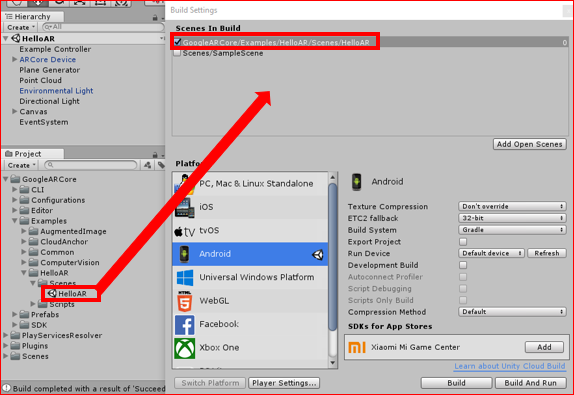
Select ‘Android’ in Platform area, and click ‘Switch Platform’. Normally need to wait for a little bit long time to switch a platform.

2.2. Set up Player Settings
Click ‘Player Settings…’ to show Player Settings screen in Inspector view.

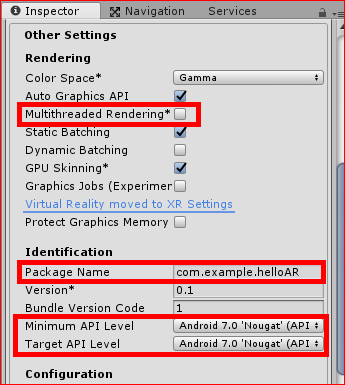
Set up followings in ‘Other Settings’ on Inspector view of Player Settings screen.
- Uncheck ‘Multithreaded Rendering*’ item
- Input your package name in Package name item, for example like following image
- Select ‘Android 7.0’ or higher in ‘Minimum API Level’ item
- Select ‘Android 7.0’ or higher in ‘Target API Lebel’ item
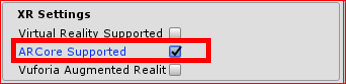
Next, set up following in ‘XR Settings’ on Inspector view of Player Settings screen.
- Check ‘ARCore Supported’ item
Drag and drop ‘HelloAR’ scene from Project view to ‘Scenes In Build’ in Build Settings screen.
Regarding next steps, I’ll introduce next time.
[Link: I tried ‘HelloAR’ sample of ‘ARCore’ Part2]
[Original Japanese Site: http://blog.lab7.biz/archives/11350202.html]