
TensorFlow provided by Google as a framework of Machine Learning and Deep Learning is now really popular. It was released a little later than other frameworks, but now it is a de facto standard.
I used Chainer of Preferred Network (Japanese product) before, but recently mainly I am using TensorFlow. After all, there are many users worldwide, it is attractive that the number of articles and materials to be helpful is very large.
This time I will explain about TensorFlow (GPU version), which installation is pretty troublesome. (Installation for the CPU version is very easy, so it is not covered here.)
In my sense, of course, depend on the model and other processing, etc., but it is 5, 6 times faster or 7, 8 times faster than the CPU version. It is better to use it if possible. It is truly attractive to finish in a few hours for the processing which took a few days if CPU version used.
Also, when using TensorFlow, there are many people who use Keras (a high level neural network library executable on TensorFlow), so here I will also explain the installation of Keras.
[Overview of the operation steps]
The flow of the whole work is shown below. I will explain the details later.
1. Create GPU environment
1.1. Install ‘Visual Studio Community 2015’
1.2. Install ‘CUDA Toolkit 9.0’
1.3. Install ‘cuDNN v7.2.1’
2. Create Python environment and Install TensorFlow
2.1. Install Anaconda
2.2. Create Python environment
2.3. Install TensorFlow (GPU)
2.4. Install Keras
[Software version]
・ Windows10
・ Visual Studio Community 2015
・ CUDA Toolkit 9.0、cuDNN v7.2.1
・ Python3.6
[1. Create GPU environment]
1.1. Install ‘Visual Studio Community 2015’
Visual Studio is required to use the GPU version of TensorFlow. A more recent version has already released, but ‘Visual Studio 2015‘ is required.
I also use Visual Studio 2017 for development, but I installed it for TensorFlow. (Visual Studio can coexist different versions.) Here I will install the free ‘Visual Studio Community 2015‘.
To download the installer first, visit the following Microsoft site.
URL:https://visualstudio.microsoft.com/ja/downloads/
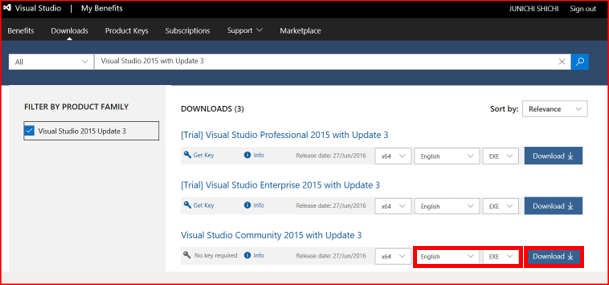
‘Visual Studio Community 2015’ is not the latest version already, so click ‘Oder versions’.
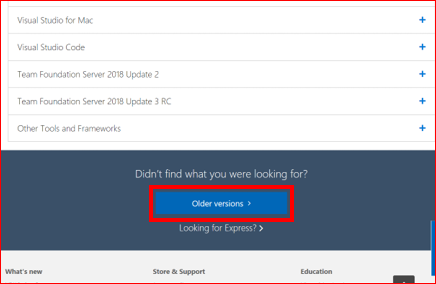
When downloading a non-latest installer, you need to participate in the free ‘Dev Essentials Program’ as written on the screen.
Click ‘join the free Dev Essentials program’, follow the instructions to register.
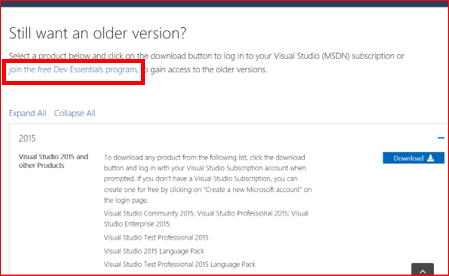
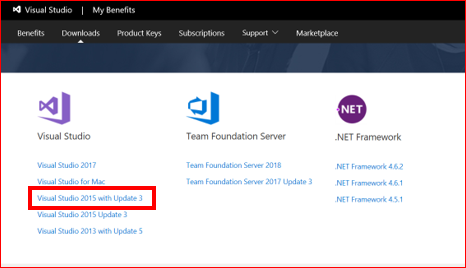
After registering, click ‘Visual Studio 2015 with Update 3’ from the following screen.
Select your language and the file format as ‘EXE’, and click the ‘Download’ button. The downloading of the installer will start.
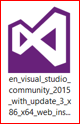
When downloading is completed, double click on the installer to start it.
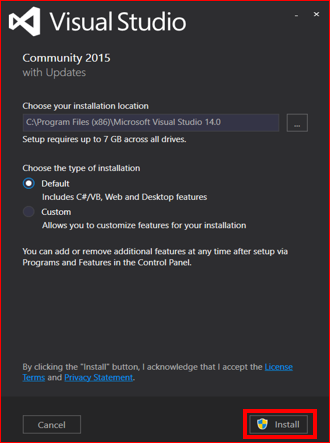
Basically, no need to change the recommended setting, it can be Default. Click the ‘Install’ button.
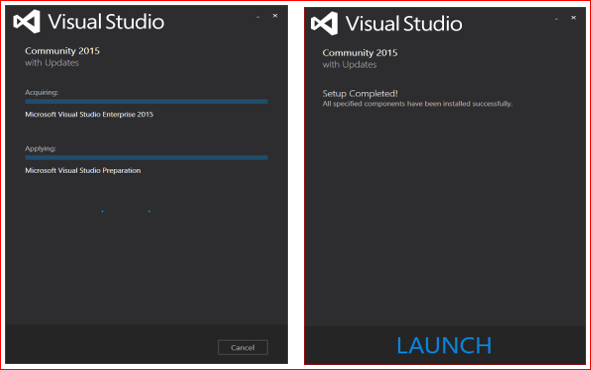
Installation will start. And the installation was completed successfully.
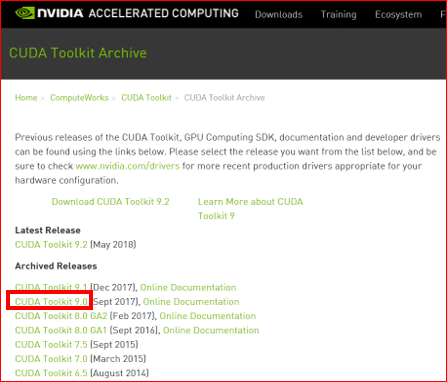
1.2. Install ‘CUDA Toolkit 9.0’
Next, install ‘CUDA Toolkit 9.0 [Sept 2017]’. This one is also not the latest, but it is better to use safer things.
Visit the following NVIDIA site.
URL:https://developer.nvidia.com/cuda-toolkit-archive
From there, click ‘CUDA Toolkit 9.0’.
Select ‘Operating System’, ‘Version’, ‘Installer Type’ you need. Here, I selected ‘Windows’, ‘10’, ‘exe [network]’.
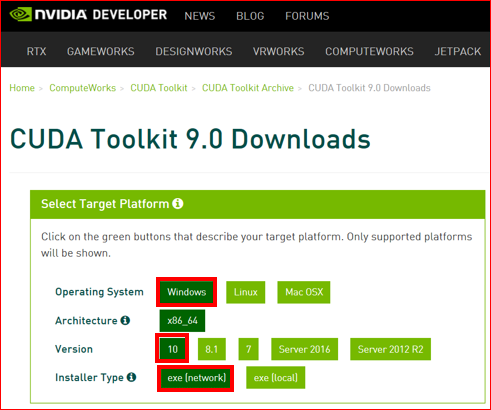
Then a download button appears below that. Click ‘Download’ button of ‘Base Installer’. And since ‘Patch’ also comes out, so download those with the ‘Download’ button.
(I used it up to Patch 1, but the more latest Patch is already available. I think that it is better not to use the latest version to avoid unnecessary problems. Because if some problems happen, the related information are not so many.)

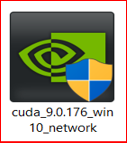
Now, double click on the downloaded installer to start it.
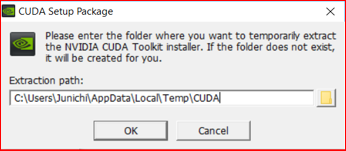
If necessary, change the folder to install. (However, it is better not to change the system proposed setting basically.)
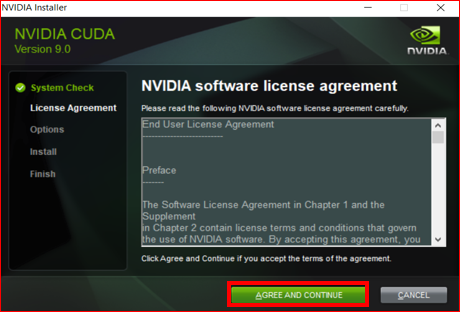
For Software License Agreement, click ‘AGREE AND CONTINUE’.
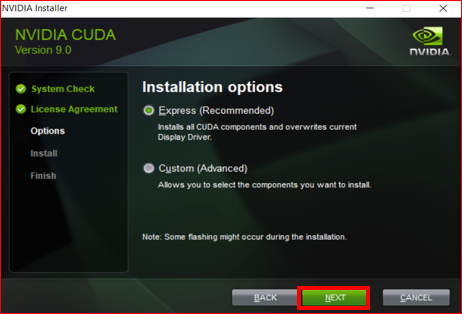
Keep ‘Express (Recommended)’, click ‘NEXT’.
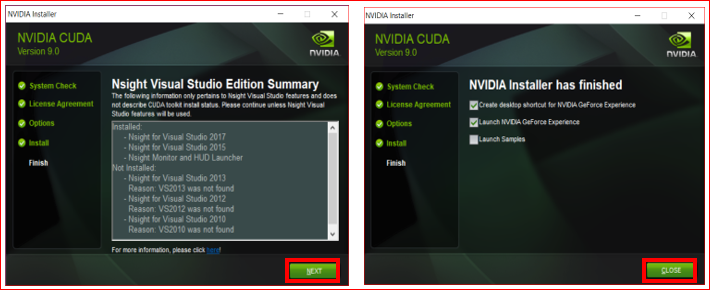
After installation, click ‘Next’ and ‘CLOSE’, and the installation of CUDA Toolkit 9.0 is completed.
Let’s make sure the installer has set the path correctly. In the command prompt, enter ‘set CUDA_PATH’ and check whether the path to the CUDA folder is set.
set CUDA_PATH

1.3. Install ‘cuDNN v7.2.1’
Next, install ‘cuDNN v7.2.1 for CUDA 9.0’. This one is also not the latest already, but I recommend to use a safer thing.
Go to the NVIDIA DEVELOPER site below. (Login is required for NVIDIA DEVELOPER site.)
URL:https://developer.nvidia.com/rdp/cudnn-download
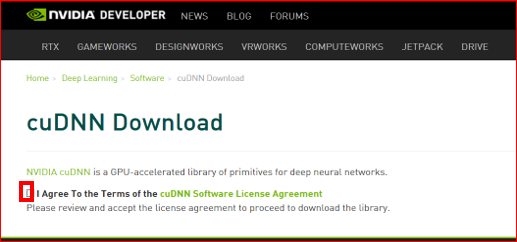
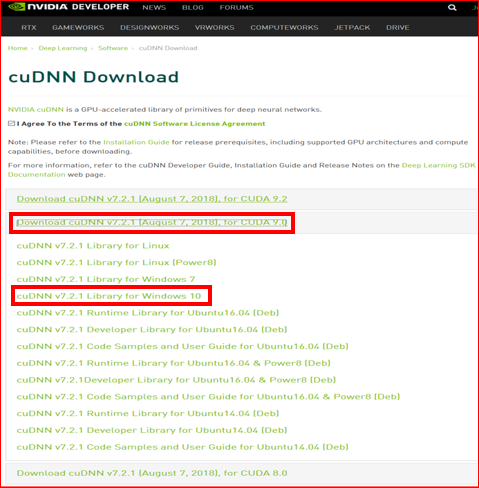
When you check ‘I Agree To the Terms of the cuDNN Software License Agreement’, a list of software that can be downloaded is displayed at the bottom of the same screen.
It is necessary to install the version corresponding to CUDA 9.0 which you installed earlier. Here, click ‘Download cuDNN v7.2.1 [August 7.2018], for CUDA 9.0’. (Although it may be released to the more latest version, please download it without mistaking what corresponds to CUDA 9.0.)
Those corresponding to various OSs are displayed, here click ‘cuDNN v 7.2.1 Library for Windows 10’ for Windows 10. The download will start.
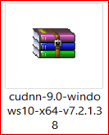
After the download of the library is completed, unzip the compressed file.
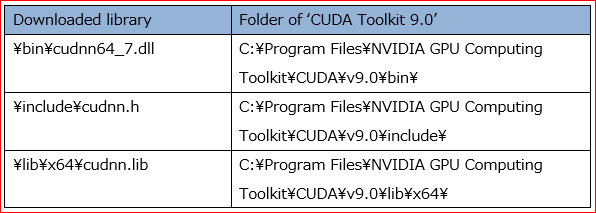
Then the following folders exist.

Copy the files in those folders to the following folder of CUDA Toolkit 9.0 that you installed earlier.

In the next time, I will explain how to build Python environment and how to install TensorFlow and Keras.
[How to install TensorFlow (GPU) and Keras Part2]
[Original Japanese Site: http://blog.lab7.biz/archives/12461981.html]