
As a framework of Machine Learning, Deep Learning, TensorFlow Google offered is very popular now. I am explaining how to install this GPU version.
Last time I explained how to build a GPU environment.
[ How to install TensorFlow (GPU) and Keras Part1 ]
This time, as a next step I will explain concretely how to build a Python environment and how to install TensorFlow and Keras.
[2. Create Python environment and Install Tensorflow]
2.1. Install Anaconda
Now the installation environment for TensorFlow (GPU version) is in place, let’s install ‘Anaconda’ firstly. With this Anaconda you can install all Python packages you required for running TensorFlow very easily.
You can download the Anaconda installer from the following site.
URL : https://www.anaconda.com/download/
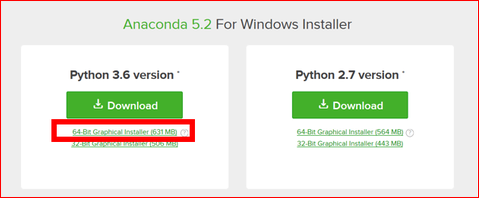
After downloading and running the installer, the following screen appears. Select ‘Python 3.6 version Download 64-Bit Graphical Installer’ and proceed with the installation.
2.2. Create Python environment
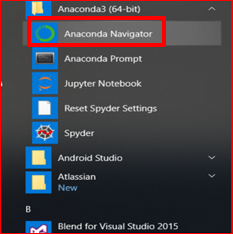
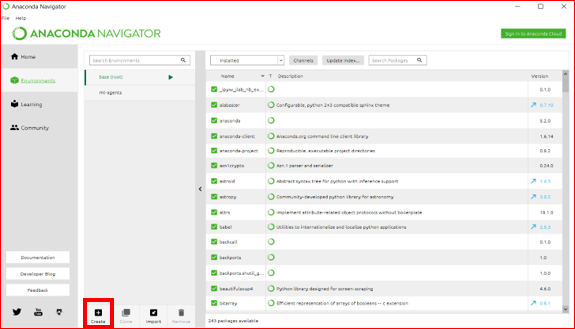
To create a Python environment, open ‘Anaconda Navigator‘.
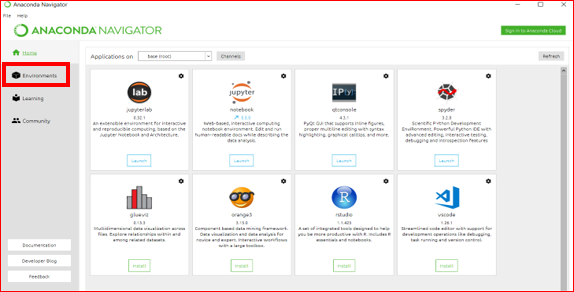
Click ‘Environments’ on the menu on the left side of Anaconda Navigator.
Click ‘Create’ on the lower menu.
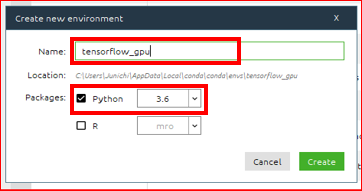
As ‘Create new environment’ screen appears, put a name, for example ‘tensorflow_gpu’, and check ‘Python’ for Packages and select ‘3.6’ from the pull down. Click ‘Create’ button.
A Python 3.6 environment has been created. Click ‘Home’ in the menu on the left.
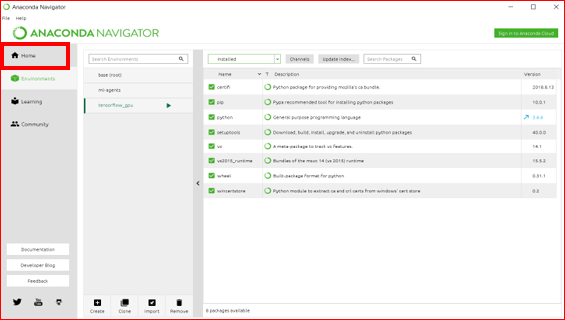
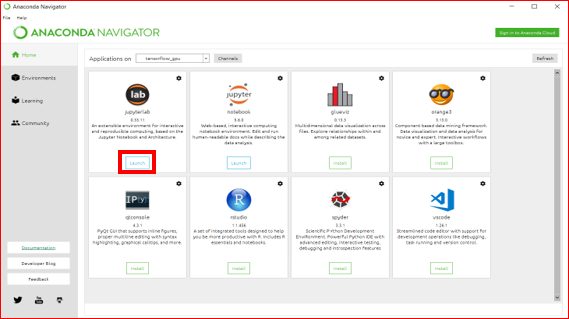
Confirm selecting ‘tensorflow_gpu’ just now created in ‘Application on’, and click the ‘Install’ button of ‘jupyterlab‘.
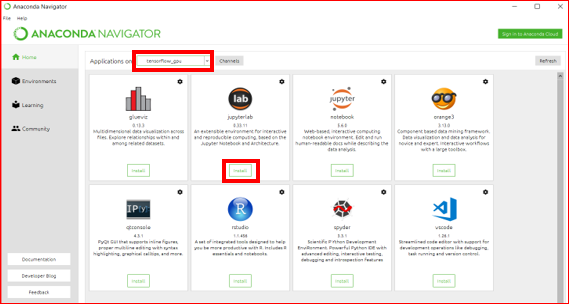
When the installation is completed, the button changes to ‘Lunch’. Click the ‘Lunch’ button of ‘jupyterlab’.
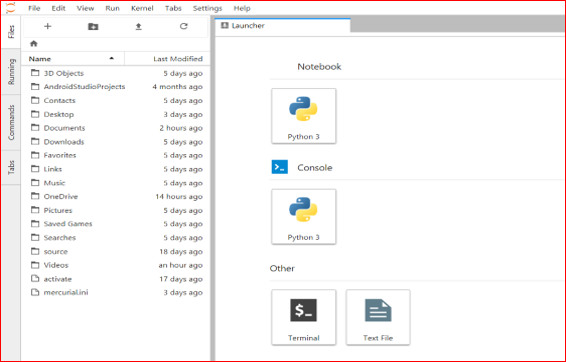
Jupyter launched on the environment of ‘tensorflow_gpu’ created now.
2.3. Install TensorFlow (GPU)
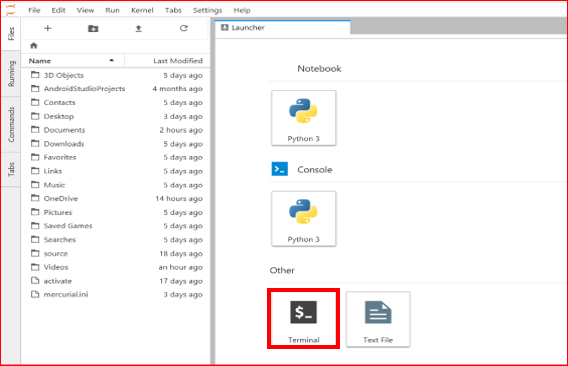
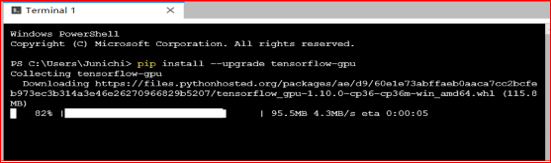
To install Tensorflow (GPU), click ‘Terminal’ button from Launcher.
As Terminal will start up, enter ‘pip install – upgrade tensor flow – gpu’ and press the enter key.
pip install –upgrade tensorflow-gpu
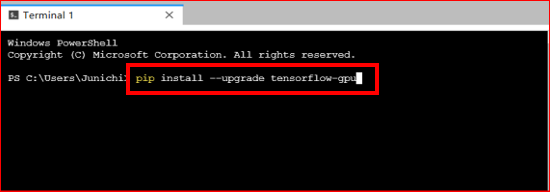
Installation of the TensorFlow GPU version in this Python environment is started.
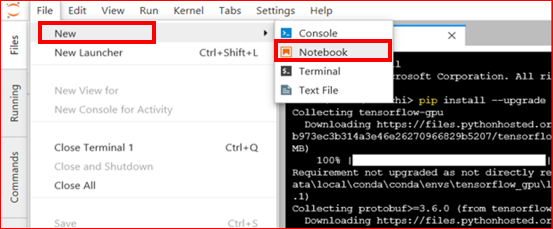
After installing TensorFlow, let’s test a simple test whether it installed correctly.
Click ‘File > New > Notebook’ from Jupyter’s menu.
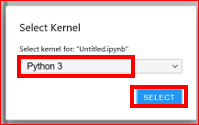
As the kernel selection screen appears, select ‘Python 3’ and click the ‘SELECT’ button.
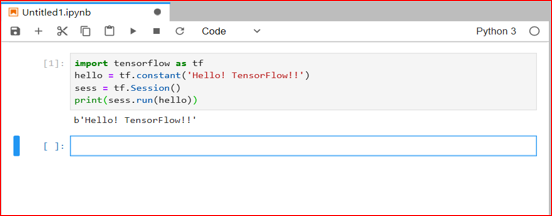
When Notebook opens, enter the program of ‘Hellow TensorFlow’ which is very common like following. This is a program that imports the installed TensorFlow and outputs ‘Hellow TensorFlow’.
import tensorflow as tf
hello = tf.constant('Hello! TensorFlow!!')
sess = tf.Session()
print(sess.run(hello))
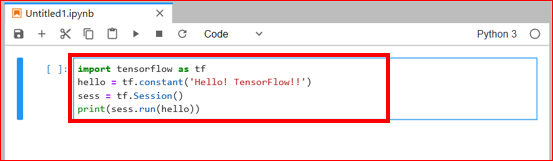
When you are done, press Shift + Enter.
If ‘Hellow! TensorFlow!!’ comes out as following, TensorFlow is installed correctly.
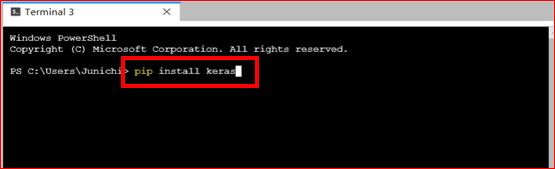
2.4. Install Keras
Next to TensorFlow, install Keras. You can use the same Terminal as installing TensorFlow.
Enter “pip install keras” as shown below.
pip install keras
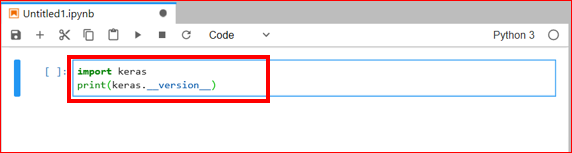
After the installation of Keras is finished, let’s test a simple test of whether it was installed properly.
Click ‘File> New> Notebook’ from Jupyter’s menu. (It is the same method as the simple test for TensorFlow.)
As the kernel selection screen appears, select ‘Python 3’ and click the ‘SELECT’ button.
When Notebook opens, let’s enter a very simple program as follows.
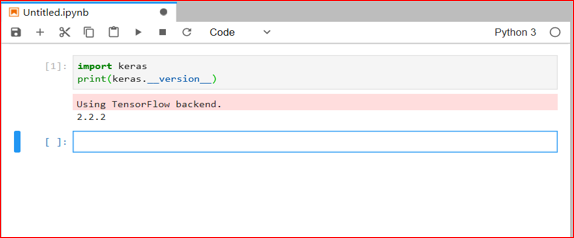
import keras
print(keras.__version__)
When you are done, press Shift + Enter.
If Keras version is output as follows, it means that Keras was correctly installed.
This completes the installation of TensorFlow (GPU version) and Keras finally.
This makes it easy to test many models of Machine Learning and Deep Learning for TensorFlows in GitHub in a short time. Please enjoy comfortable Machine Learning and Deep Learning life with TensorFlow GPU version by all means.
[Original Japanese Site: http://blog.lab7.biz/archives/12510734.html]