

Regarding the AR development library ‘ARCore’ provided by Google, I introduced the setting ways of two sample programs (HelloAR and Cloud Anchors) before.
【 I tried ‘HelloAR’ sample of ‘ARCore’ Part1 】
【 I tried ‘Cloud Anchors’ (A sample of ‘ARCore’) Part1 】
This time, I will show you how to set up a sample program of ‘Augmented Image‘, a function to recognize image markers. It is a sample which is the most typical pattern of AR. It recognizes the 2D image as a marker and displays the AR content.
The above image is the final image of this sample program for Augmented Image. The 3D objects of the frame are displayed around the target image.
The original information of this ‘Augmented Image’ is as follows.
【 Recognize and Augment Images 】
[Overview of the operation steps]
(The following 1 and 2 are almost the same as HelloAR which explained in past post.)
1. Download ‘ARCore SDK for Unity’ and Import
1.1. Download ‘ARCore SDK for Unity’
1.2. Import ‘ARCore SDK for Unity’
1.3. Confirm the folder structure (Option)
2. Set up in Unity
2.1. Switch the platform to Android
2.2. Set up Player Settings
3. Run on your mobile phone
4. Change Marker image
4.1. Confirm Maker image
4.2. Change Marker image
4.3. Try new Maker image
5. Change displayed 3D objects
5.1. Register new Database
5.2. Confirm related C# scripts
5.3. Register new 3D objects
[Used software version]
• Windows 10
• Unity 2018.2 (JDK and Android Studio should be installed beforehand.)
• ARCore SDK for Unity v1.4.0 (required v1.2 or later)
[1. Download ‘ARCore SDK for Unity’ and Import]
1.1. Download ‘ARCore SDK for Unity’
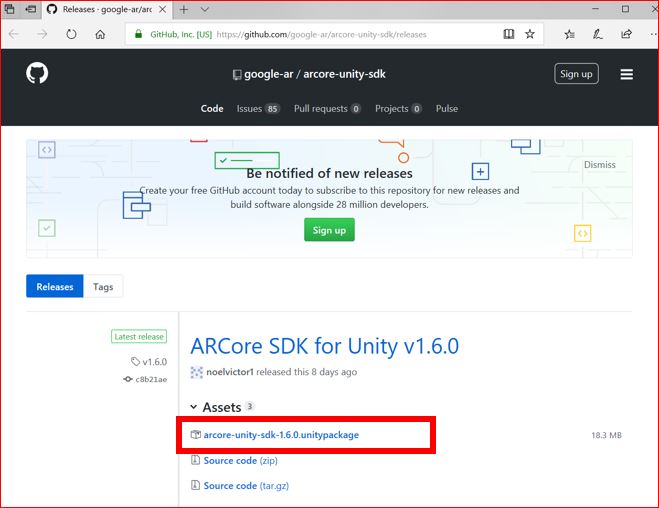
Firstly, download latest ‘ARCore SDK for Unity’ from GitHub. You can download the Unity Package from following link.
[Link: https://github.com/google-ar/arcore-unity-sdk/releases]
In this case ‘ARCore SDK for Unity v1.4.0’, click ‘accore-unity-sdk-v1.4.0.unitypackage’ to download. (Depending on version of the Unity Package, the screen will be changed.)
1.2. Import ‘ARCore SDK for Unity’
Next, open Unity Editor.
Import the Unity Package which is downloaded just now.
‘Assets > Import Package > Custom Package…’.
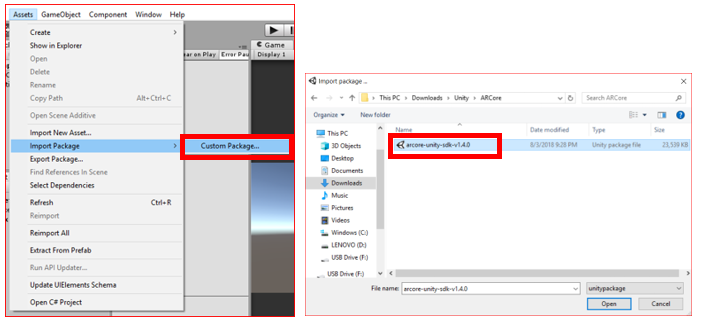
Confirm selected all, click ‘Import’ button. Importing the package will be started.
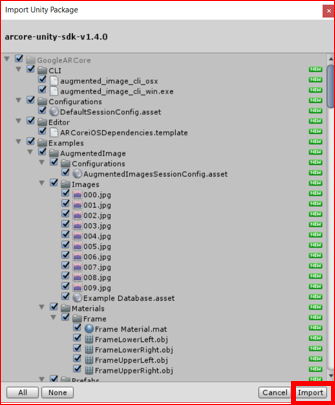
After completion of the importing, you can start to use ARCore.
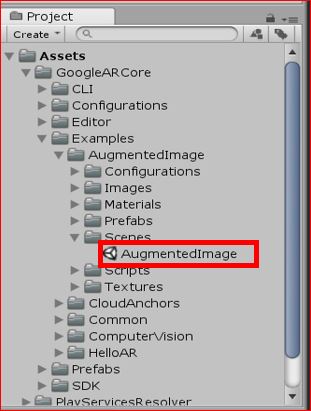
1.3. Confirm the folder structure (Option)
Here, let’s see the folder structure of ARCore SDK for Unity.
- GoogleARCore > Examples: You can see some samples of this ARCore SDK.
- GoogleARCore > Examples > AugmentedImage: You can see a scene and a script for Augmented Image sample.
- GoogleARCore > Examples > AugmentedImage > Images: You can see some sample marker images and a marker image database.
[2. Set up in Unity]
2.1. Switch the platform to Android
Let’s start to set up the sample Augmented Image in Unity.
Firstly, by double clicking scene ‘AugmentedImage’, open AugmentedImage scene.
GoogleARCore > Examples > AugmentedImage > Scenes > AugmentedImage
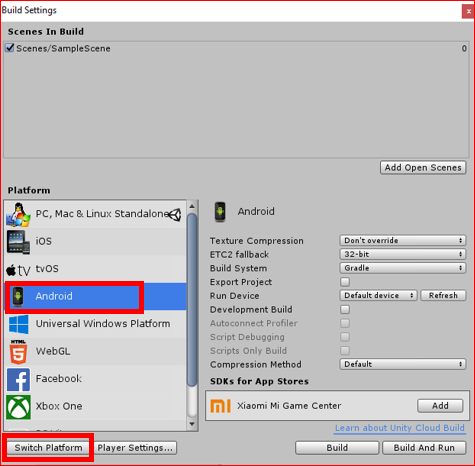
Normally, I think when open new Unity project, the platform setting is ‘PC, Mac & Linux Standalone’. However, ARCore is for Android, you need to switch the platform to Android.
Open ‘Build Settings’ screen by ‘File > Build Settings…’.

Select ‘Android’ in Platform area, and click ‘Switch Platform’. Normally need to wait for a little bit long time to switch a platform.
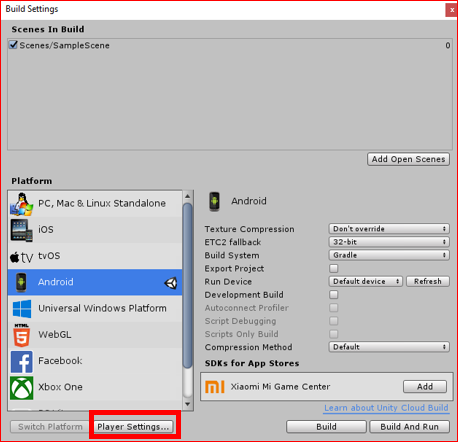
2.2. Set up Player Settings
Click ‘Player Settings…’ to show Player Settings screen in Inspector view.
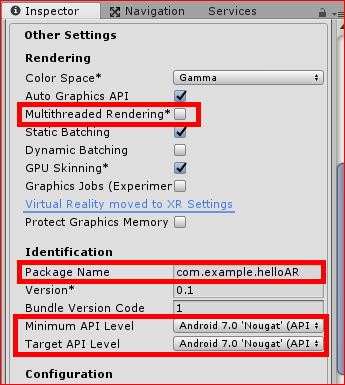
Set up followings in ‘Other Settings’ on Inspector view of Player Settings screen.
- Uncheck ‘Multithreaded Rendering*’ item
- Input your package name in Package name item, for example like following image
- Select ‘Android 7.0’ or higher in ‘Minimum API Level’ item
- Select ‘Android 7.0’ or higher in ‘Target API Lebel’ item
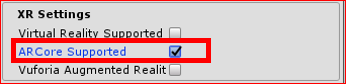
Next, set up following in ‘XR Settings’ on Inspector view of Player Settings screen.
- Check ‘ARCore Supported’ item
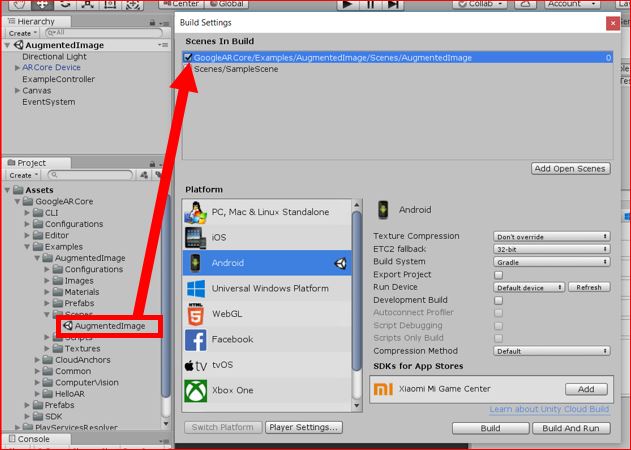
Drag and drop ‘AugmentedImage’ scene from Project view to ‘Scenes In Build’ in Build Settings screen.
[3. Run on your mobile phone]
Connect to Android device by USB cable. (Beforehand, need to turn on for USB debugging on the Android device.)
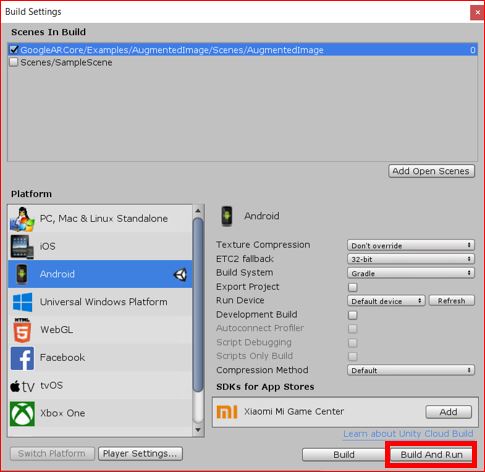
Click ‘Build And Run’ to start to build and install the app to your device. Anything is ok for the file name.
Open the app on your Android device, and start to search Marker Image in a screen with showing ‘Fit the image you’re scanning’.
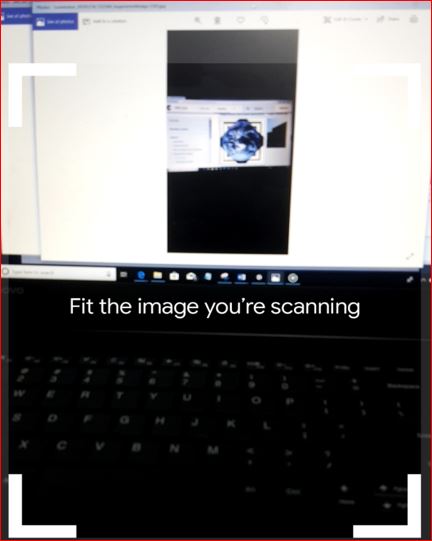
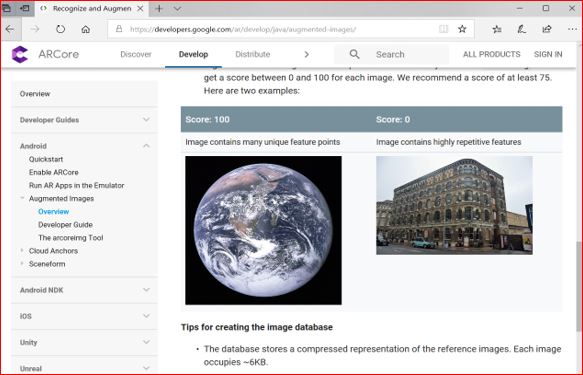
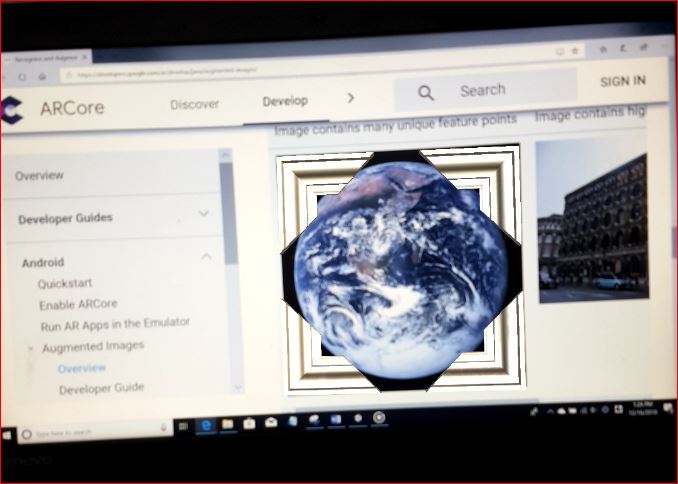
Even if you do not print the Marker Image, it can recognize it on the screen of the PC, so let’s make it recognize the sample image directly from the screen.
There is one of the sample images on the following site, open the page and display the image on the screen. It is an image of the Earth in the middle.
https://developers.google.com/ar/develop/unity/augmented-images/
When you display the image of this earth in the application, the frame was displayed at the four corners as an AR objects.
Next time, I’ll introduce how to change the Marker Image and display 3D objects.
[Link: The setting way of ‘Augmented Image’ of ‘ARCore’ Part2]
[Original Japanese Site: http://blog.lab7.biz/archives/14599170.html]