

Here, I’m explaining How to install Unity in an easy-to-understand manner for participants in our ‘Unity Programming Class‘ and those who are new to Unity.
(This manual is for Unity 2019.2 which is the latest version of Unity at the time of making this. New versions are released frequently, but the installation method does not change so much, so please install the latest version if necessary.)
(This manual uses the operations and screen images of Windows. If you are using a Mac, please do the appropriate operation for your OS. The important parts are explained.)
(This manual assumes that we develop the smartphone application for Android device. If you are targeting iPhone application, Mac is required.)
【Overview of the operation steps】
1. Download Unity Hub installer
2. Install Unity Hub
3. Create Unity ID and Sign in
4. Authorization for a new license
5. Install Unity
6. Try to create a new project (Option)
【How to install Unity】
1. Download Unity Hub installer
Access the following site with a browser.
https://store.unity.com/download?ref=personal
(This link is for ‘Unity Personal‘. In addition, there are ‘Unity Plus’ and ‘Unity Pro’. Only ‘Unity Personal’ is free, it include all functions.)
(‘Unity Plus’ and ‘Unity Pro’ must be selected based on the company’s total annual sales, as it’s mentioned on the site. For beginner users to learn, ‘Unity Personal’ is OK.)
To agree to the Terms of Service of using Unity Personal, check the ‘By clicking, I confirm …’ flag and click ‘Download Unity Hub’.
(If you are using Mac, click ‘Choose Mac OS X’ to continue.)
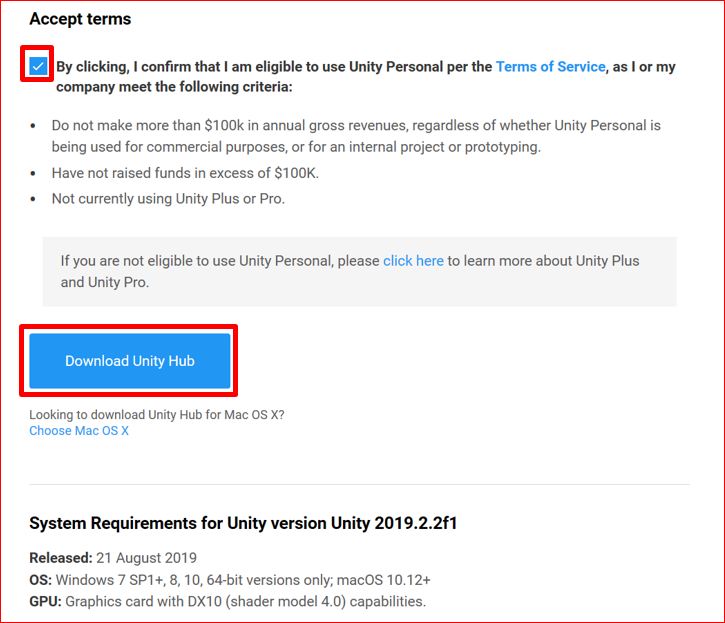
The following buttons will appear at the bottom of the browser. Click ‘Save’ to save the installer.

2. Install Unity Hub
Double click the installer file downloaded on the PC to start installing Unity Hub.

Unity Hub installer is opened.
Because only the installer was downloaded first, a large number of files will be downloaded from here.
(You should connect to Wifi, which has a fast line speed and is not pay-per-use.)
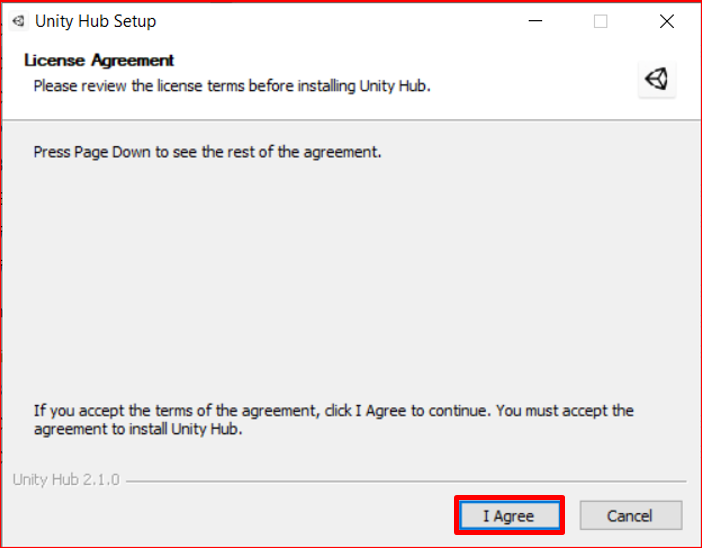
The License Agreement screen is displayed. Read the content and click ‘I Agree’.
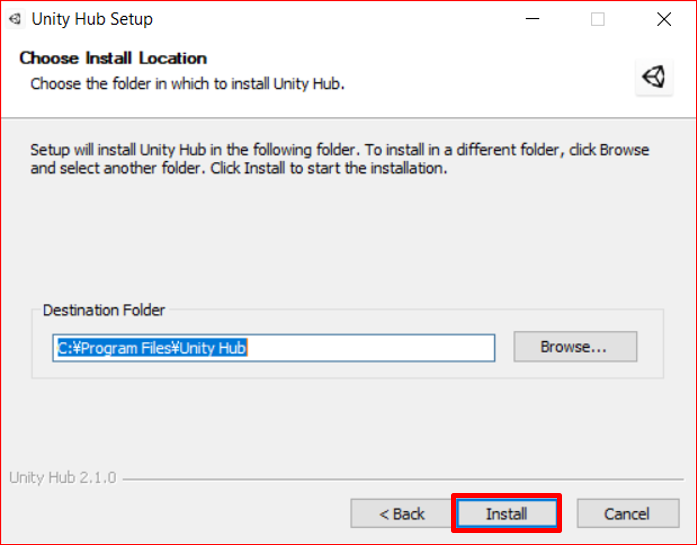
Next, the screen to select installation folder is displayed. No need to change this. Just click ‘Install’.
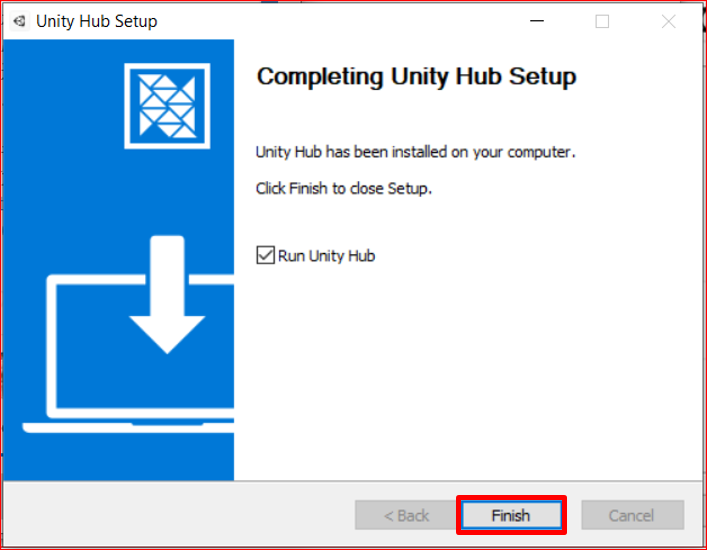
It doesn’t take so much time to install Unity Hub. When the following completion message is displayed, click ‘Finish’.
3. Create Unity ID and Sign in
Click the Unity ID icon at the top right of the launched Unity Hub, and click ‘Sign In’ in the menu that opened.
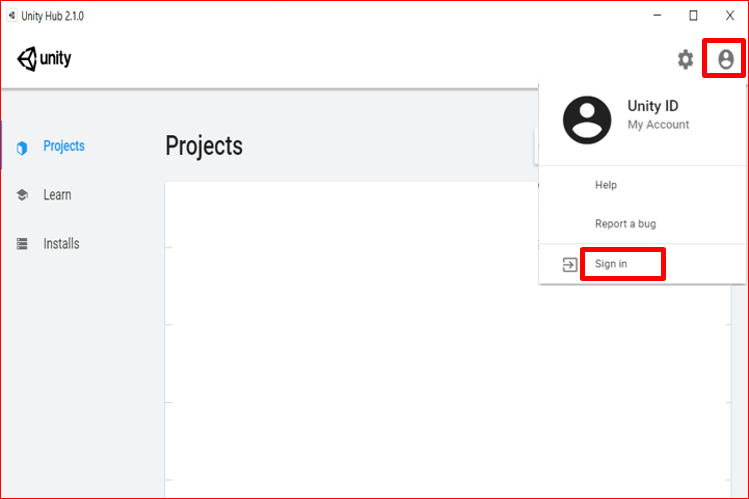
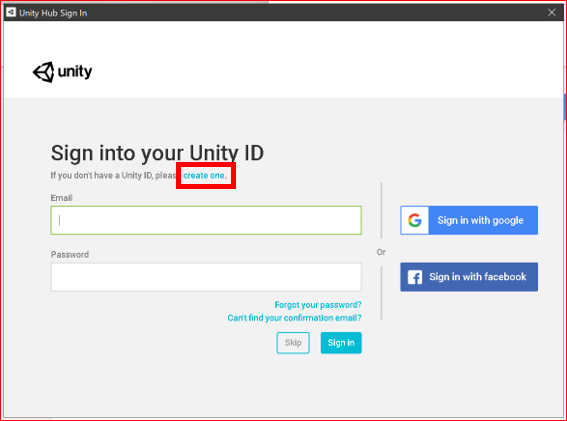
Unity ID sign-in screen will be displayed. If you already have your Unity ID, enter your E-mail address and Password and click ‘Sign In’.
If you have not yet registered your Unity ID, click ‘create one’.
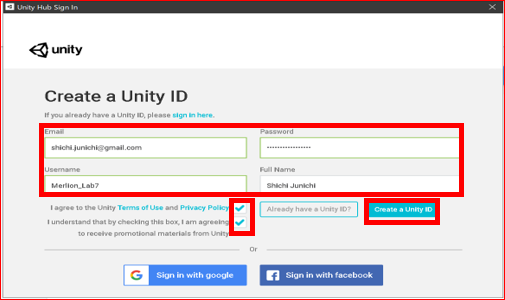
The new registration screen for Unity ID appears.
Enter E-mail, Password, Username and Full Name.
(Username must be something that is not used by others. If it is already used by someone else, you will be prompted to change it to another name.)
At least need to check the ‘Term of Use and Privacy Policy’ which is above one in the two check boxes. The bottom one can be option.
Then click ‘Create a Unity ID’ to register a new Unity ID.
When you register new, you will be signed in at the same time. If you already have your Unity ID, sign in and start here.
Your initials are displayed on the Unity ID icon on the screen.
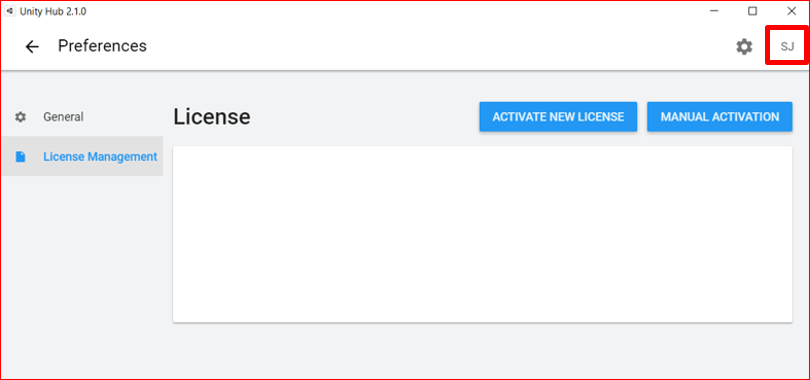
4. Authorization for a new license
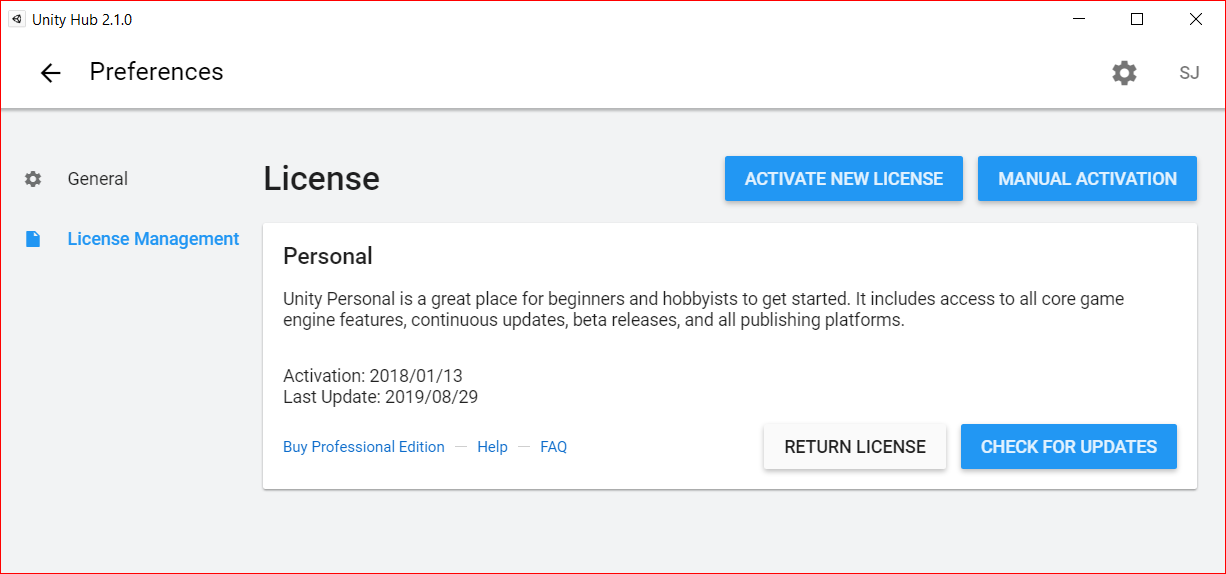
We already chose the free version of ‘Unity Personal’ earlier, but now need to activate license type to use ‘Unity Personal’ again.
First, click ‘ACTIVATE NEW LICENSE’.

Select ‘Unity Personal’ on the License Agreement screen.
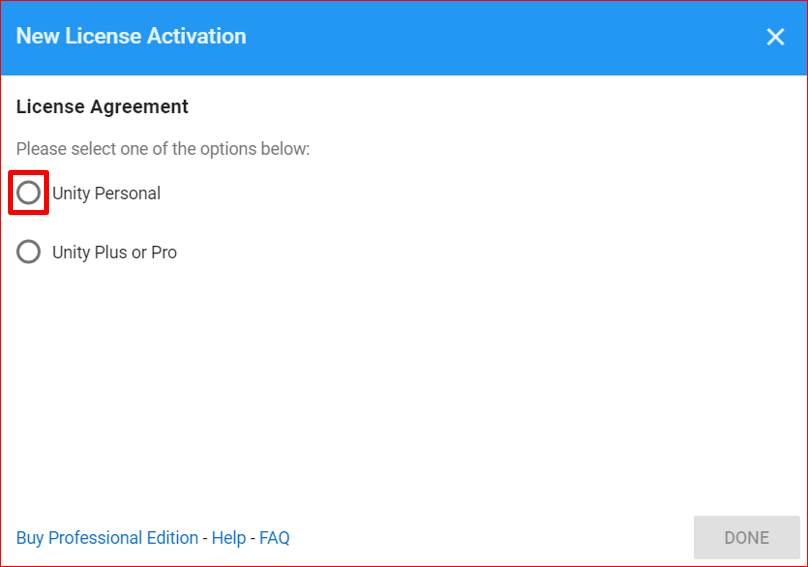
Then, select ‘don’t use Unity in a professional capacity’ and click ‘DONE’.

‘Unity Personal’ license activation is complete.
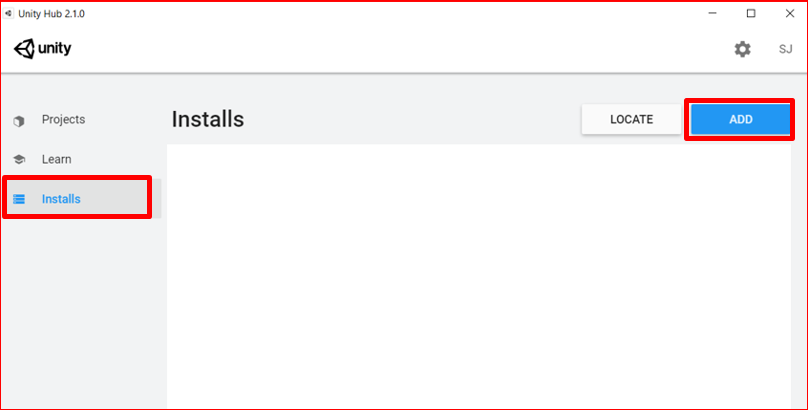
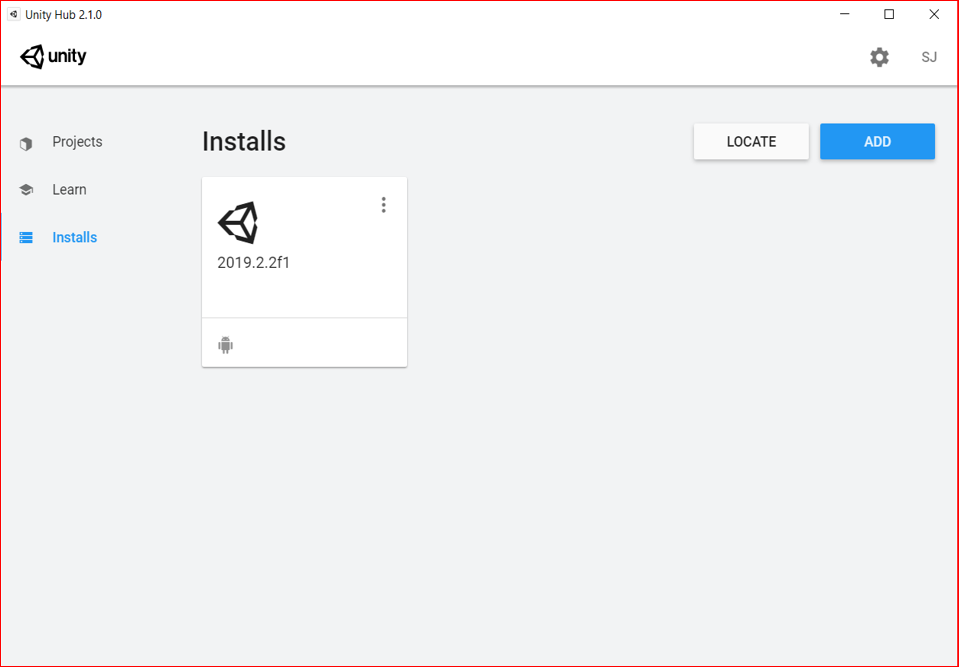
5. Install Unity
Now we are finally ready to install Unity. Click ‘Installs’ on the left menu to display the installation screen, and click the ‘ADD’ button on the upper right.
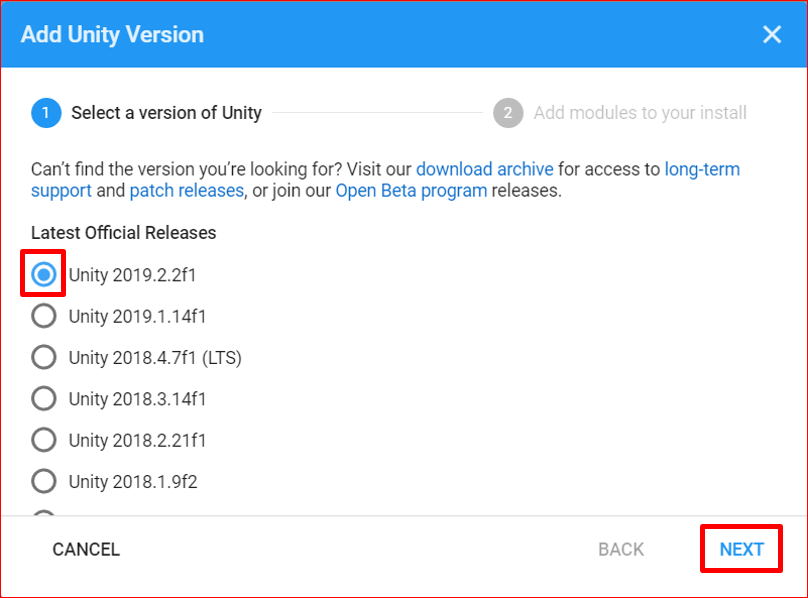
The Add Unity Version screen appears. Select the top item which is the latest official release. (Here, it is ‘Unity 2019.2.2f1’.)
(Since the latest version is released frequently, the actual version displayed is maybe different.)
Click ‘NEXT’.
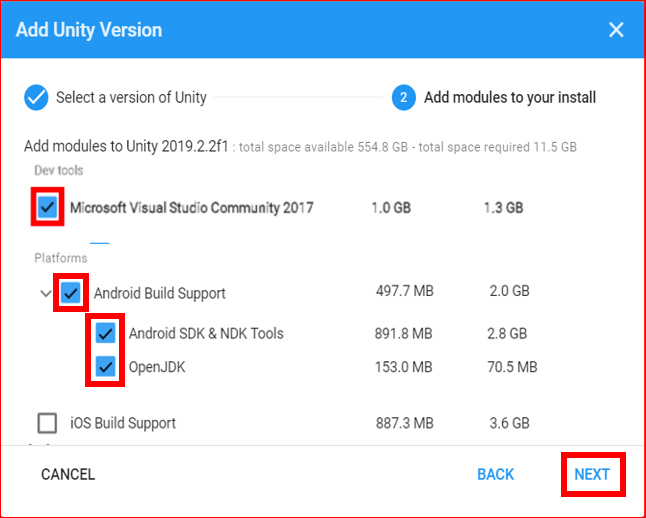
Next, select the module to install.
Unity uses Microsoft Visual Studio Community 2017 when writing programs. If it is already installed, it will not be displayed, but if it has not been installed yet, ‘Microsoft Visual Studio Community 2017’ will be displayed and checked.
If you need to create Android application, check ‘Android Build Support’. Then expand it and check ‘Android SDK & NDK Tools’ and ‘Open JDK’.
(When you create an application for Android using Mac PC, the above is also used. And if you create an application for iPhone using Mac PC, it is necessary to install ‘iOS Build Support’.)
(In addition, modules you didn’t select here can be installed later.)
Finally, click ‘NEXT’.
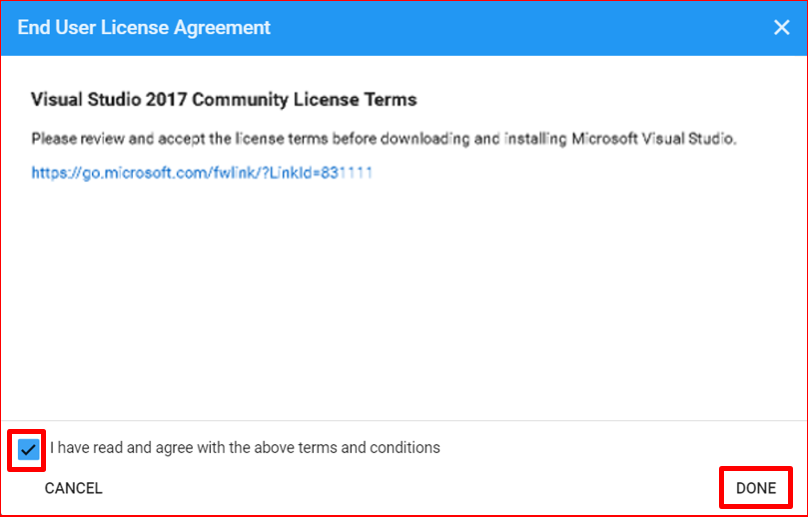
The End User License Agreement screen for Visual Studio 2017 Community that will be used when creating the program will be displayed. Check ‘I have read and agree …’ and click ‘DONE’.
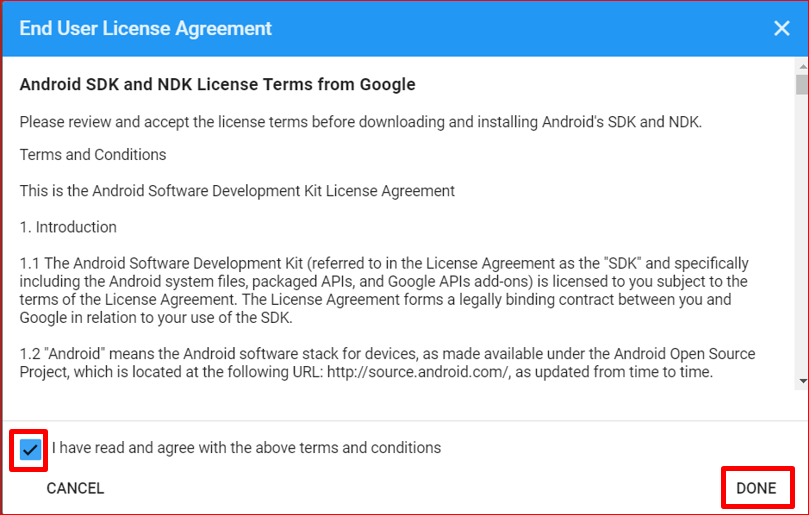
Next, Android SDK and NDK License Terms from Google screen will be displayed. Check ‘I have read and agree …’ and click ‘DONE’.
Unity installation will start.
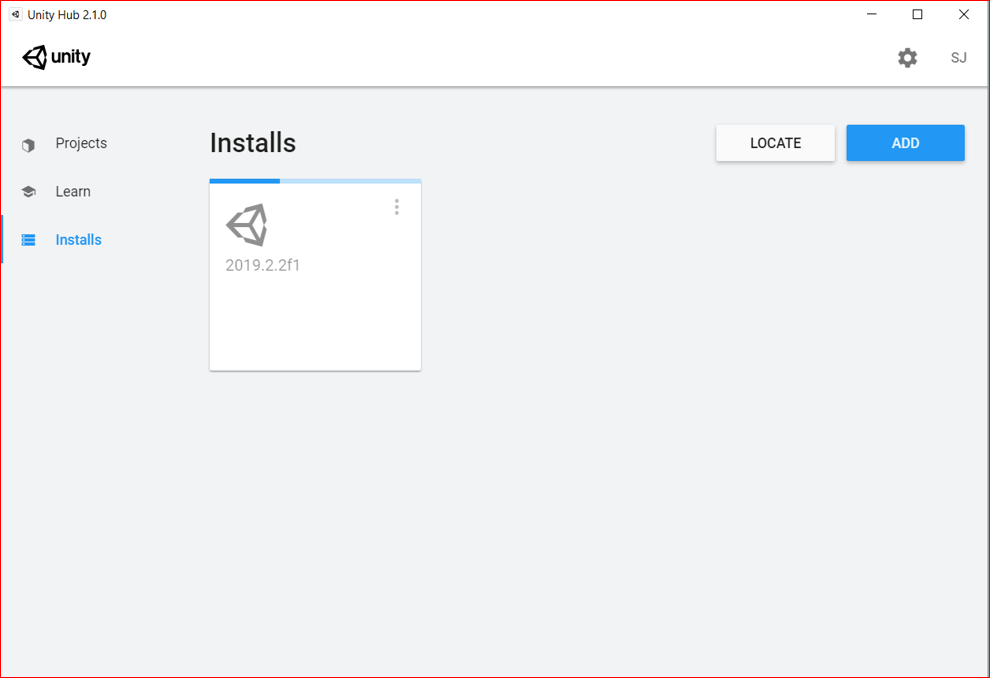
Visual Studio installation will also start automatically.
Installation finished successfully.
6. Try to create a new project (Option)
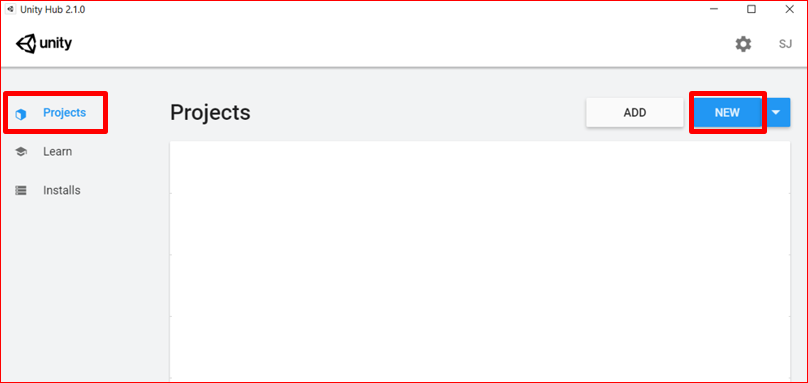
Now completed to install Unity, let’s try to create a new Unity project as a test.
Click ‘Projects’ in the menu on the left side of Unity Hub. Then click ‘NEW’ button on the upper right side.
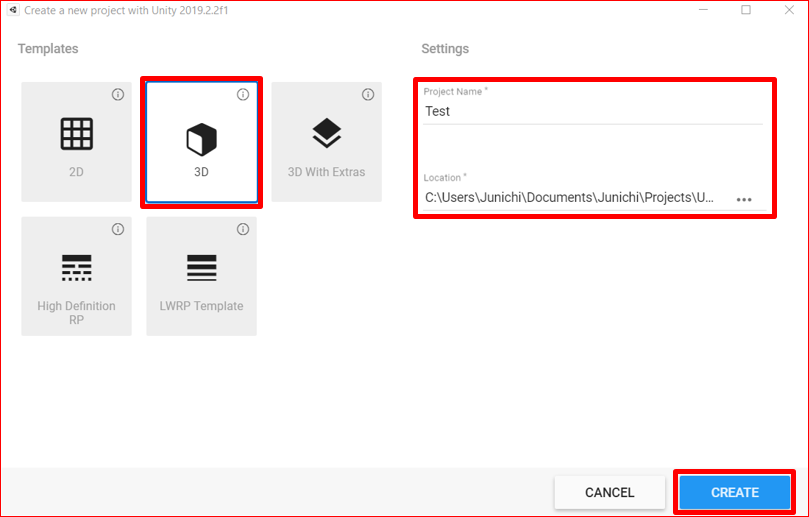
The project template selection and setting screen will be displayed. Input the project name and save destination, and select ‘3D’ template here. Then click ‘CREATE’ button.
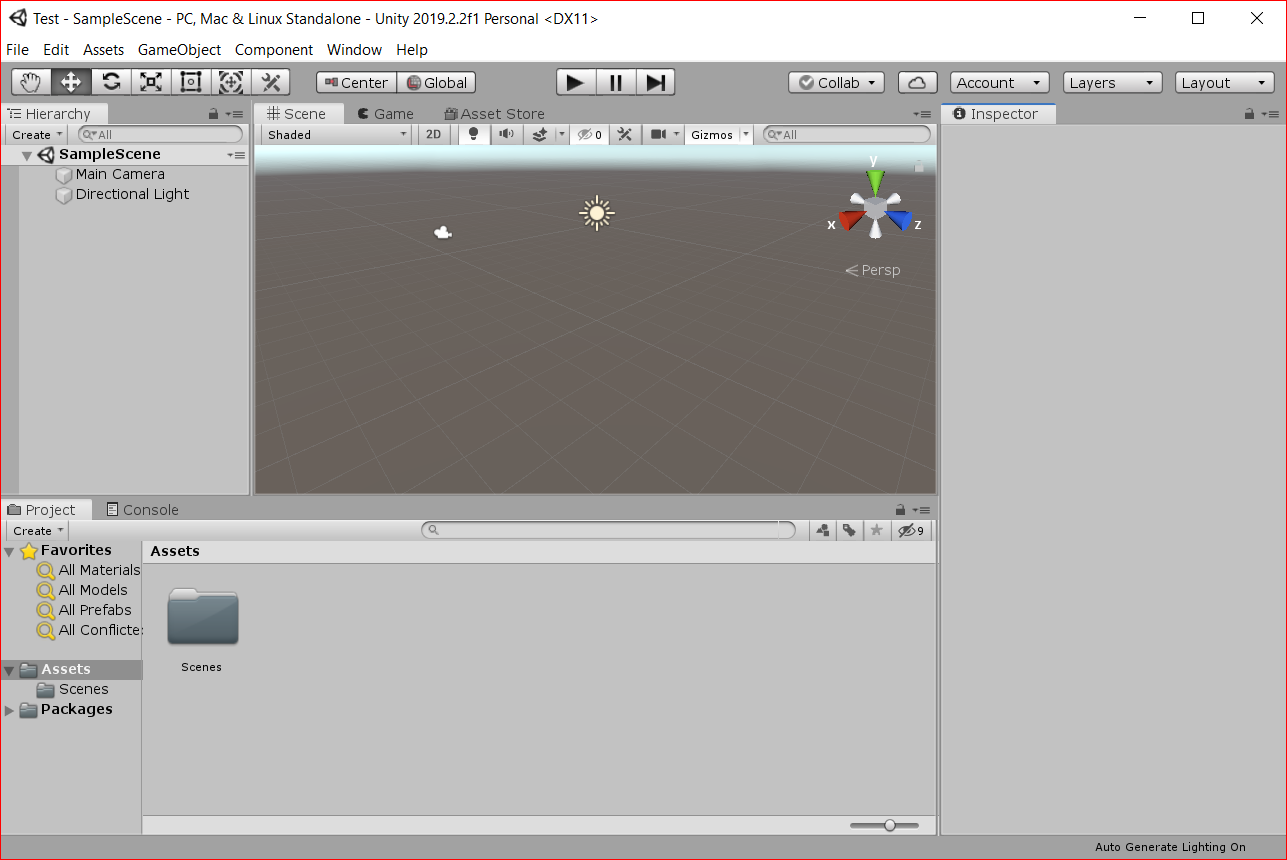
Unity starts to open.
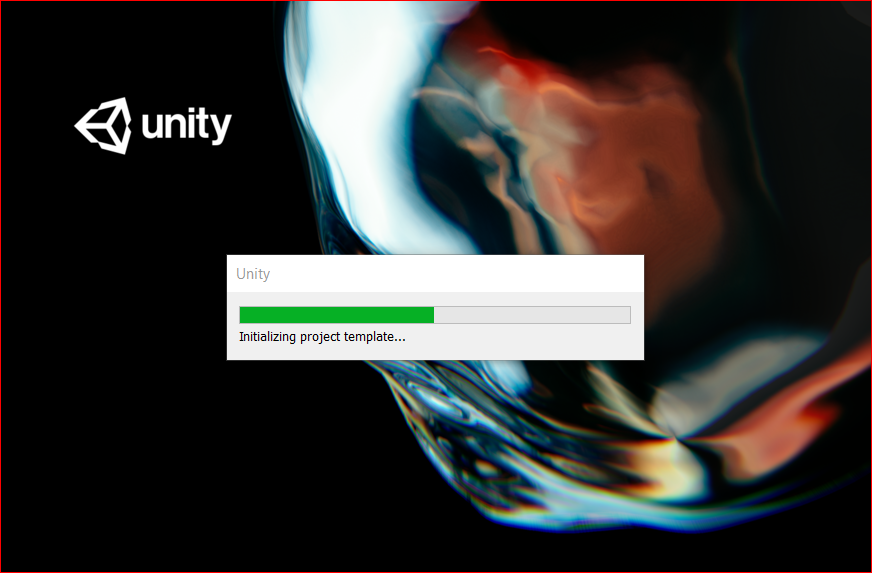
Unity has started up successfully.
I think the installation of Unity itself will be completed without any problems. You are now ready for program development of your game!
[Original Japanese Site: http://blog.lab7.biz/archives/20055307.html]