
Last time, I reported about ‘Unity AR Foundation’ course hosted by Unity Singapore, which participated on April 23.
(The instructor of the course on the day is Marek Marchlewicz, Evangelist of Unity Singapore.)
There, I introduced the basics of the first half of the course, such as what AR Foundation is like.
【 ‘Unity AR Foundation’ Session Report 】
This time, based on the contents of the AR Foundation exercises that were in the second half of the course, I will try to explain how to set up ‘Unity AR Foundation’ with many screen images.
【Overview of the Setting Operation】
This setting operation will proceed in the following flow.
Step 0: Build Environment as Preparation
Step 1: Import Required Packages
Step 2: Add AR Session Object and Player Setting
Step 3: Display Setting of Recognized Feature Points
Step 4: Display Setting of Recognized Plane
Step 5: Create C# Script to Display 3D Objects
Step 6: Test Running on Mobile Device
【Step 0: Build Environment as Preparation】
The environment is as follows. Unity had released Unity 2019.1 on the day of this course, but since it was released just before, we used Unity 2018.3.
And, depending on whether you build on Android or iOS, the pre-preparation and the first half setting work will be changed. Here is an example of building on an Android device.

In addition to installing Unity, you also need to install ‘Android Build Support platform component‘ and ‘Android SDK tool‘.
You also need to enable ‘USB Debugging‘ on your Android device.
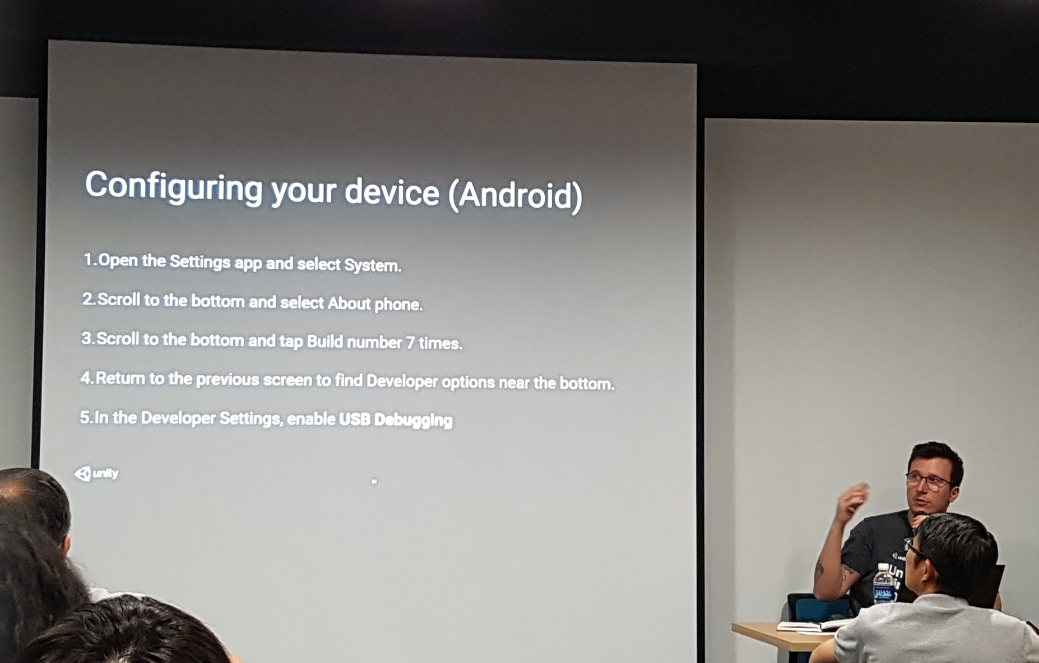
These are already configured if you have already built for Android devices regardless of AR before.
(You need to do similar settings if you want to build for iOS in advance.)
【Step 1: Import Required Packages】
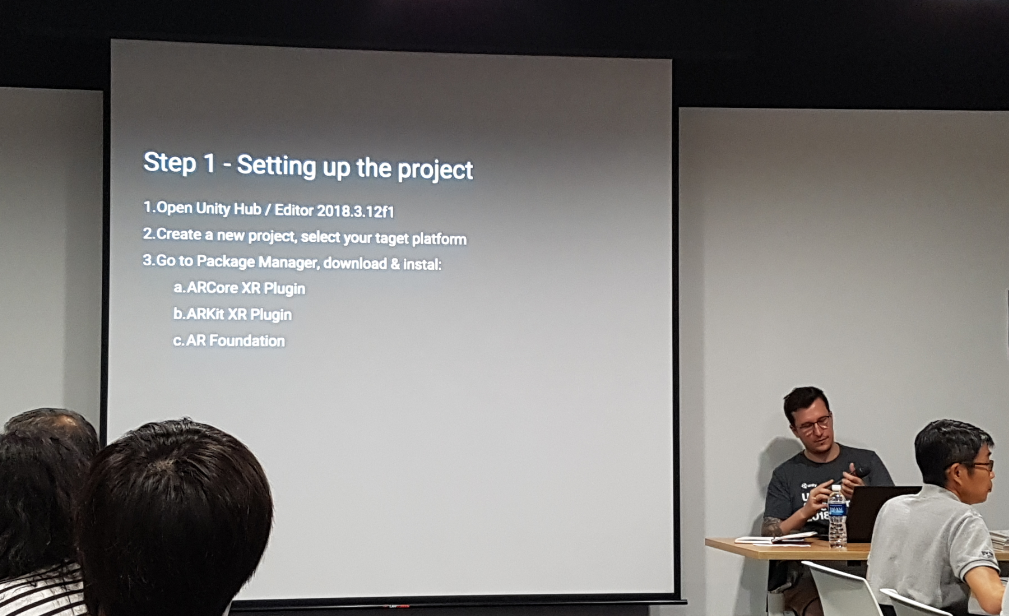
Launch Unity and create a new project.
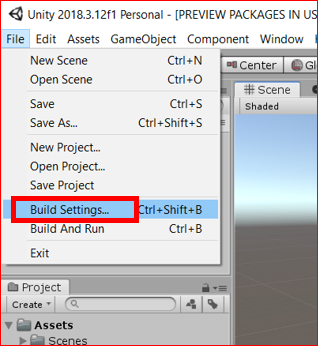
Change the Target Platform to Android. Click ‘File> Build Settings …‘ from the menu.
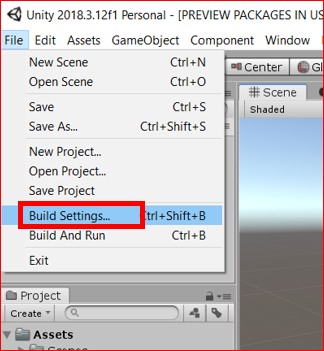
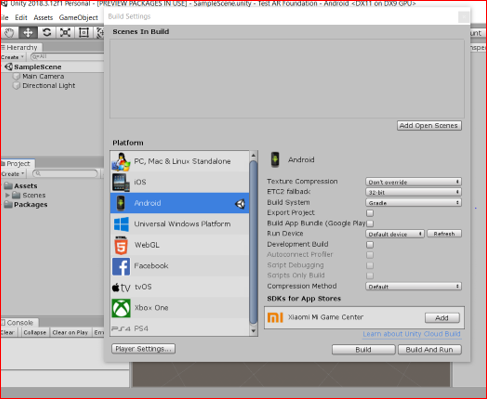
On ‘Build Settings’ screen, change Platform first. In the Platform window, change the Target Platform to ‘Android’ this time and click the ‘Switch Platform‘ button.
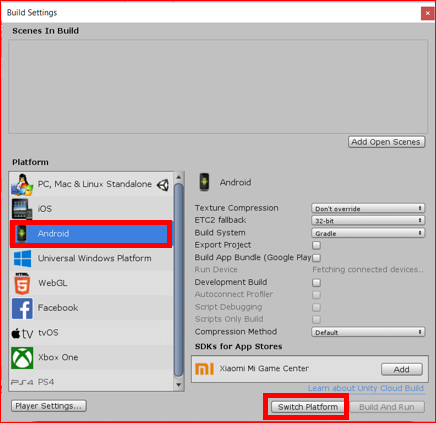
Changing platform needs to take quite long time.
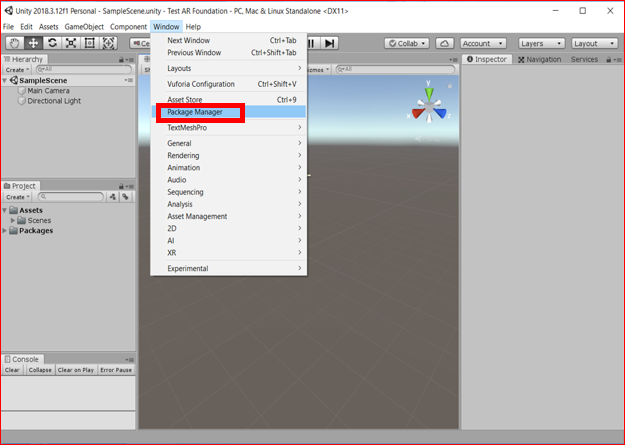
Next, import the required packages for AR Foundation by Package Manager.
Launch ‘Package Manager’ by clicking on ‘Windows > Package Manager‘ from the menu.
The Packages are listed on the Package Manager as follows, but you can not find ‘AR Foundation’.
(This is happen at the time of writing this report, so if you find ‘AR Foundation’, you can proceed to next process.)
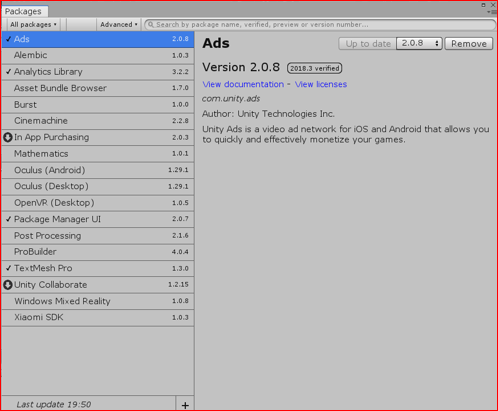
Actually, packages which are Preview version are not usually displayed in Package Manager. So click on ‘Advanced > Show preview packages‘.
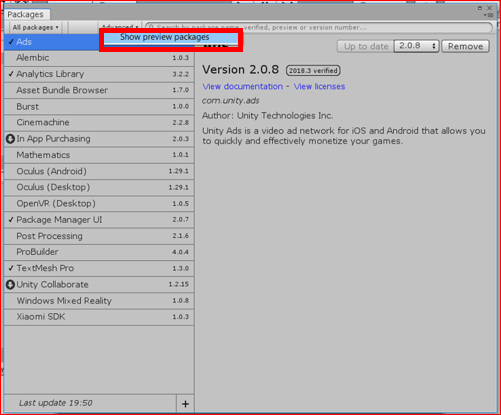
Here, system will ask ‘Preview packages are not verified with Unity, may be unstable, and are unsupported in production. Are you sure you want to show preview packages?’. Of course, click ‘Yes‘.

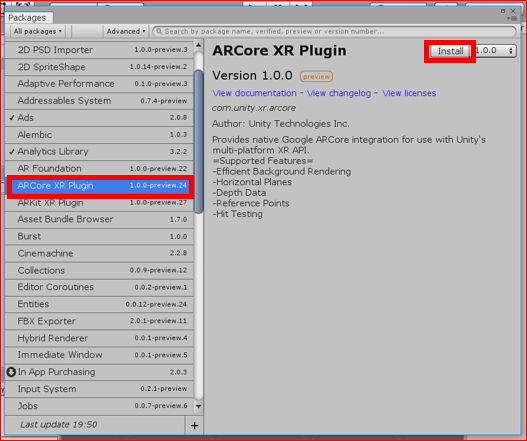
Then, a large number of Preview version of Package will be displayed.
This time, in order to support Android, ‘ARCore XR Plugin‘ and ‘AR Foundation‘ Plugin are needed to be installed by clicking ‘Install‘ button respectively.
(When building to iOS, install ‘ARKit XR Plugin‘ instead of ‘ARCore XR Plugin’.)

【Step 2: Add AR Session Object and Player Setting】
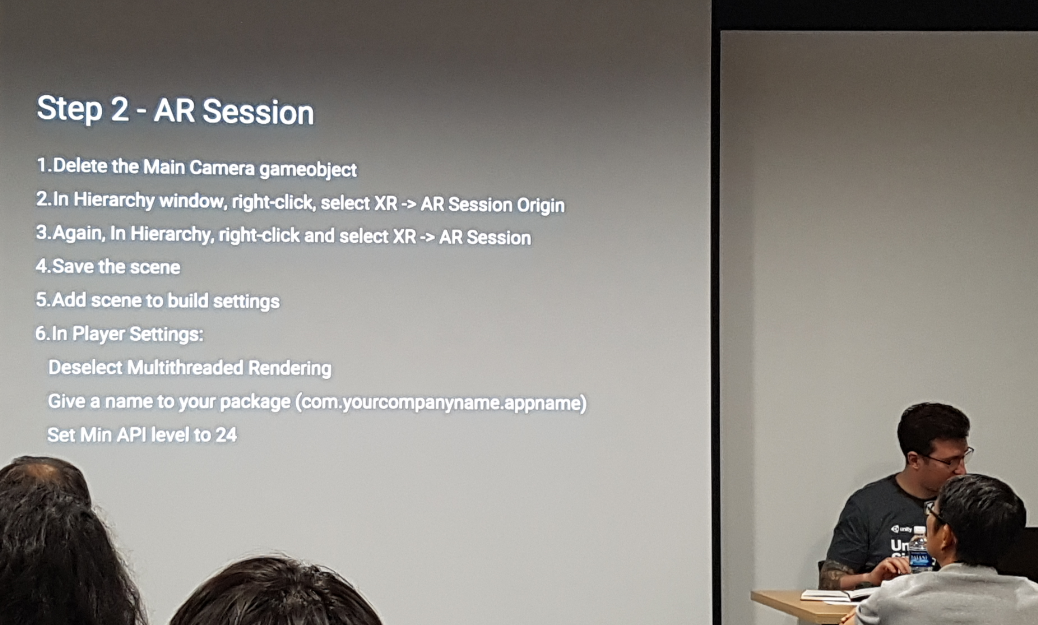
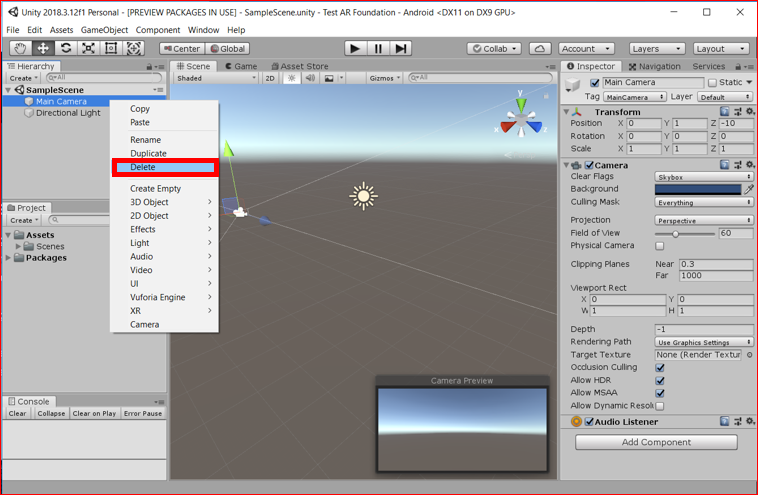
When creating AR, it is normal to use AR camera. So firstly delete the default Main Camera.
From Hierarchy view, right click on the ‘Main Camera’ object and click ‘Delete‘.
Next, create ‘AR Session Origin‘ object by clicking ‘Create> XR> AR Session Origin‘ from Hierarchy view.
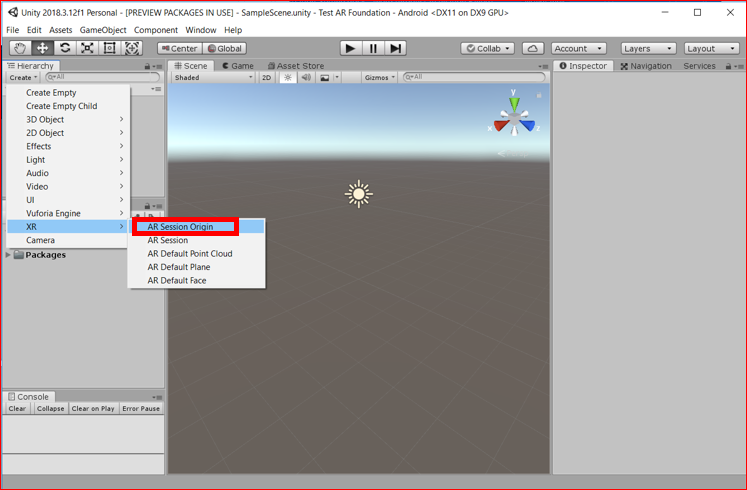
Also, from Hierarchy view, click ‘Create > XR > AR Session‘ to create ‘AR Session‘ object.
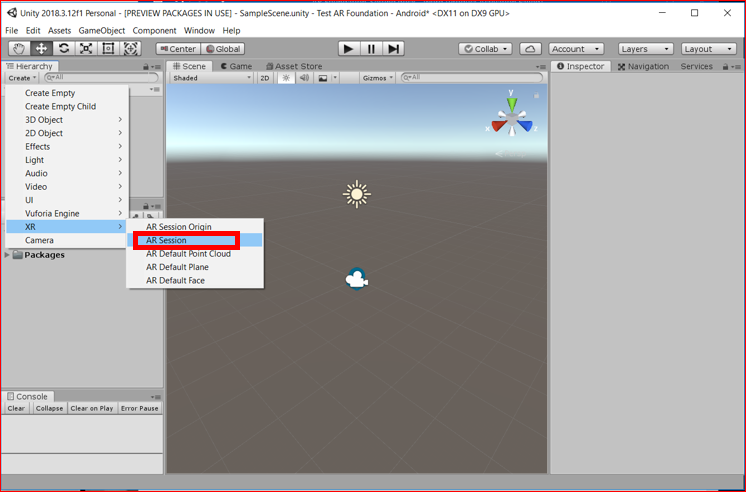
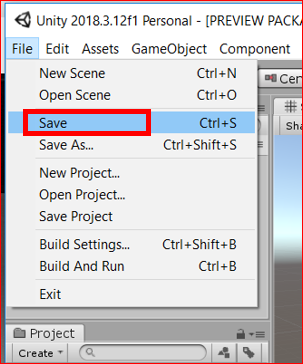
Here, save the Scene once. (File > Save)
Next, set up Player Setting. Click ‘File > Build Settings…‘ from the menu.
Click the ‘Player Settings…‘ button from ‘Build Settings’ screen.
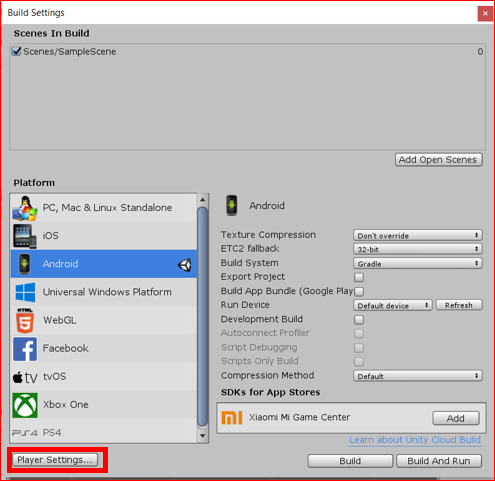
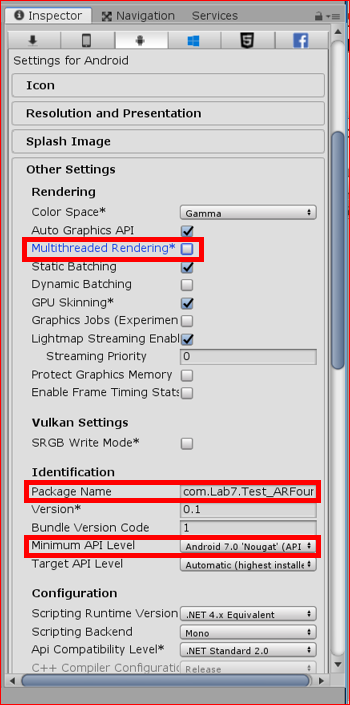
Make the following settings in ‘Other Settings’ area of ‘Player Setting’ screen displayed in Inspector view.
– Uncheck ‘Multithreaded Rendering‘.
– Enter ‘Package Name‘.
(You can use any name, but it will usually be ‘com.Company name.App name’.)
– Select ‘API level 24’ in ‘Minimum API Level‘.
【Step 3: Display Setting of Recognized Feature Points】
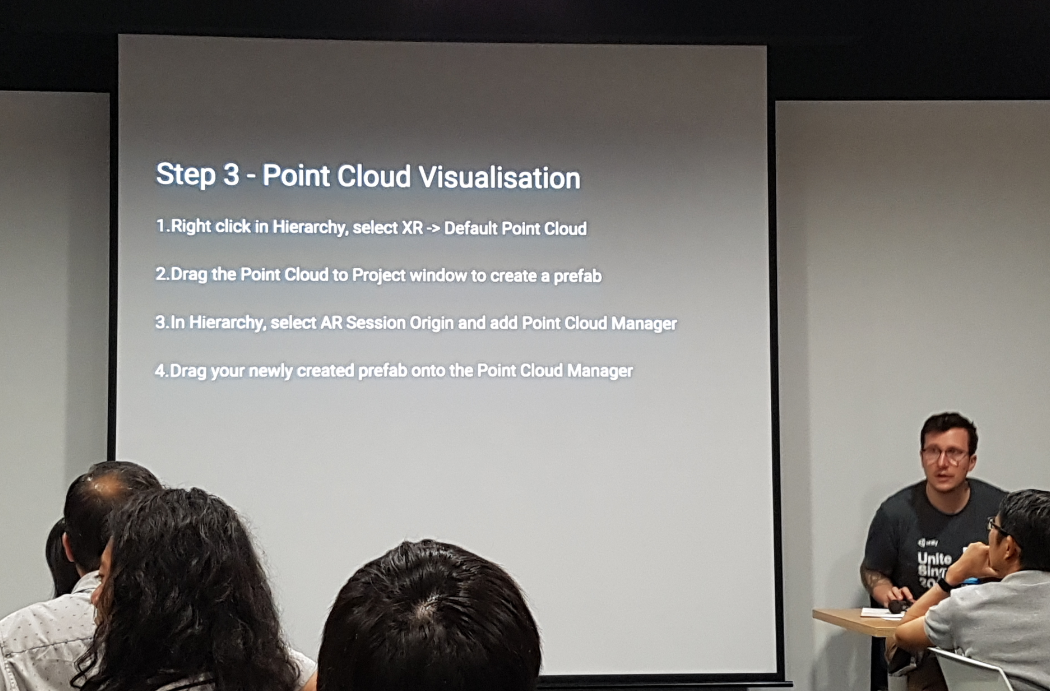
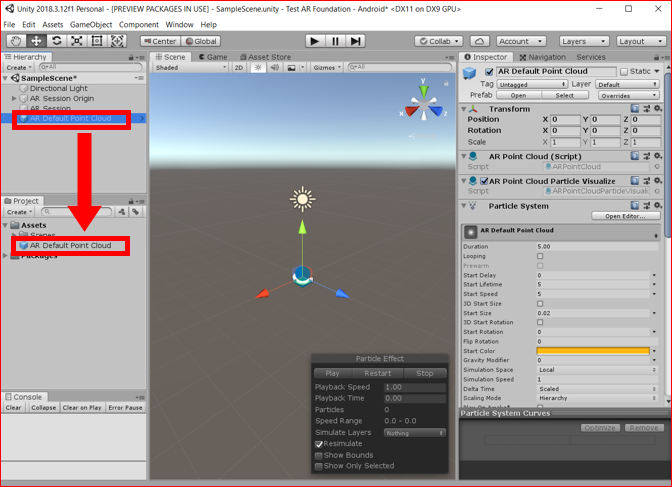
First, create ‘AR Default Point‘ object by clicking ‘Create > XR > AR Default Point Cloud‘ from Hierarchy view. This will be the dot displayed when the feature point is recognized.
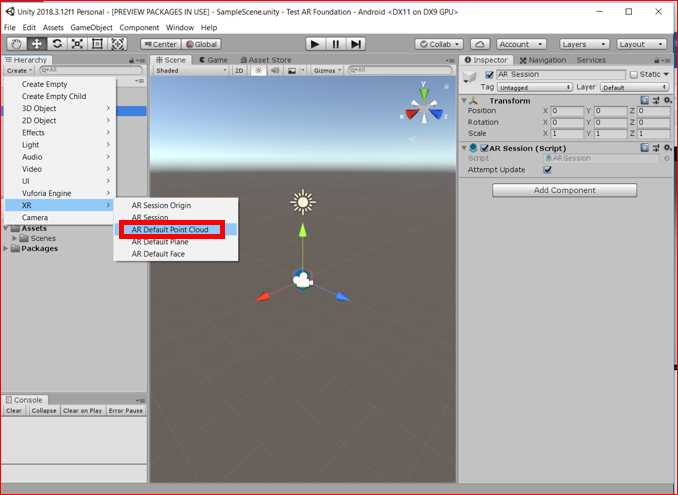
Drag and drop ‘AR Default Point Cloud’ on Hierarchy view to Project view to make it be Prefab.
Click ‘AR Session Origin’ on Hierarchy view and click ‘Add Component‘ button on Inspector view. From there, search for ‘AR Point Cloud Manager‘ and add it.
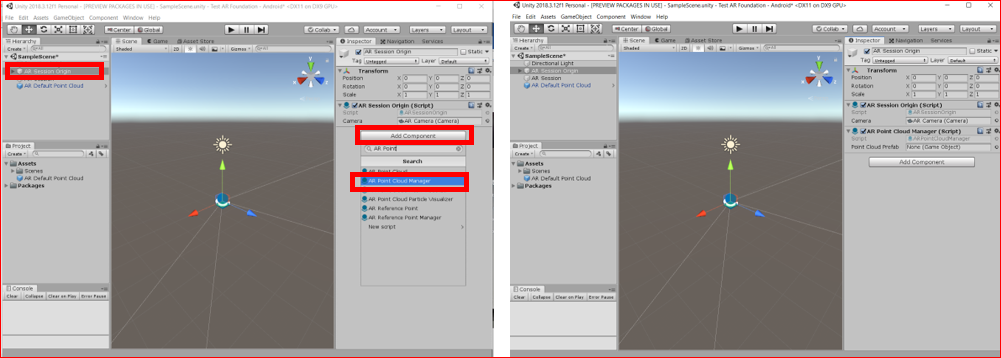
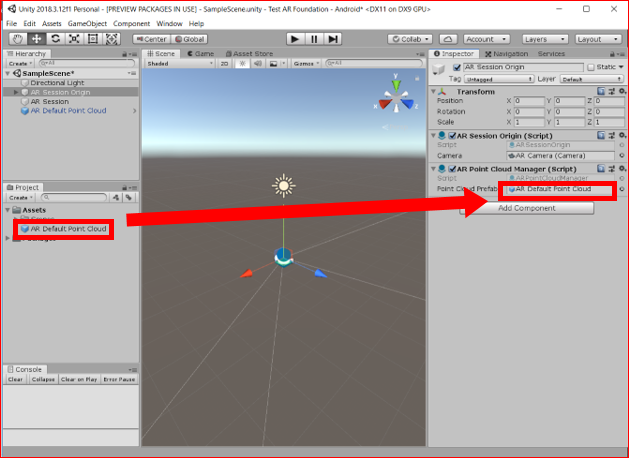
Drag and drop ‘AR Default Point Cloud’ on Project view that has already been Prefab to ‘Point Cloud Prefab’ on ‘AR Point Cloud Manager’ component on Inspector view.
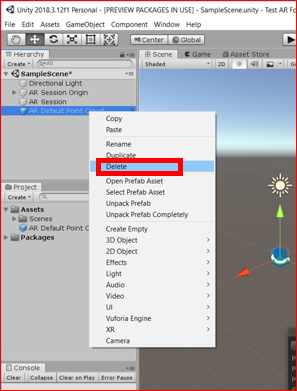
Finally, you do not need the game object on Hierarchy view which is already created Prefab object, so right click and click ‘Delete‘.
Ok, next step is Step4, I will explain from Step 4 next time.
【 How to set up Unity AR Foundation Part.2 】
【 Original Japanese Site: http://blog.lab7.biz/archives/18004657.html 】