
This time, it is a report of the Hands-on training part of ‘Unity AR Foundation‘ course hosted by Unity Singapore that I participated on April 23.
Based on the contents of the AR Foundation exercises, I’m explaining how to set up ‘Unity AR Foundation’ with some screen images.
【 How to set up Unity AR Foundation Part.1 】
Last time, I explained from Step 1 to Step 3 (Import Required Packages, Add AR Session Object and Player Setting, Display Setting of Recognized Feature Points), I will start from Step 4 this time.
【Step 4: Display Setting of Recognized Plane】
First, create ‘AR Default Plane‘ object by clicking ‘Create > XR > AR Default Plane‘ from Hierarchy view. This is a plane object to be displayed when the real plane is recognized.

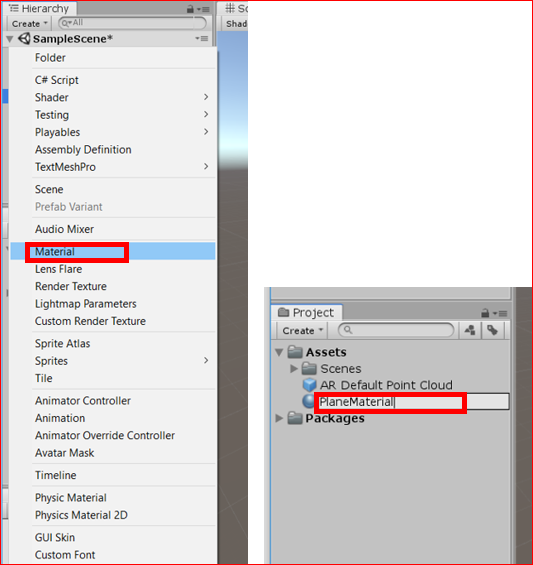
Next, colorize the plane object to make it easy to understand when it recognize the plane. Click ‘Create> Material‘ in Project view to create a Material. I put the name ‘PlaneMaterial’ here.
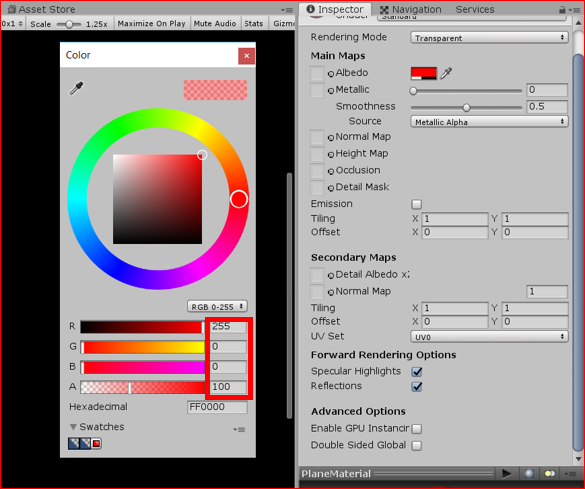
Click the ‘PlaneMaterial’ material on Project view and change Albedo on Inspector view.
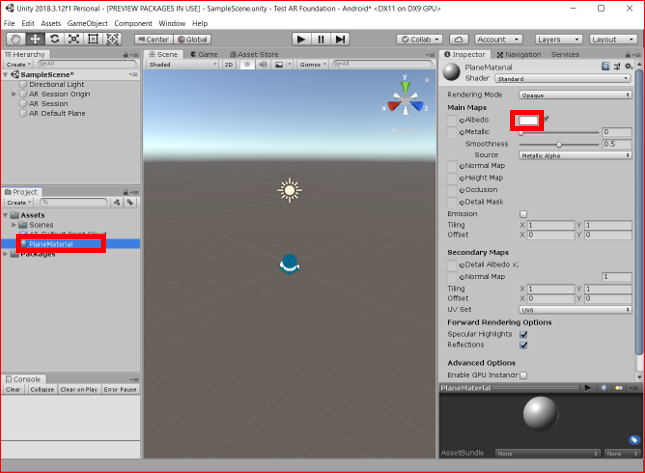
Color window will be displayed, so here I will set a slightly transparent red so that the recognized floor can be seen. (RGBA (255, 0, 0, 100))
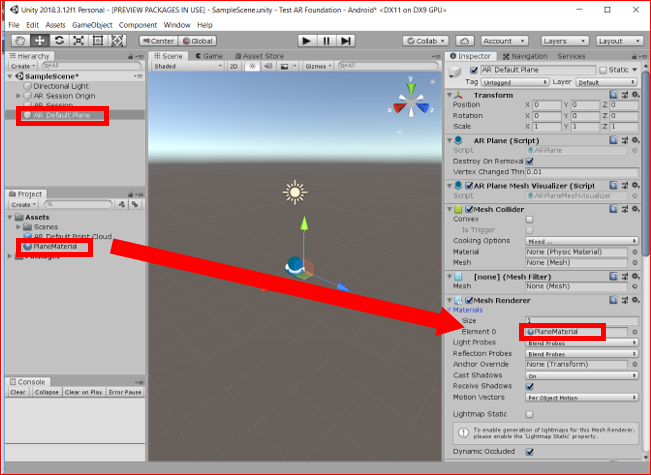
Click ‘AR Default Plane’ object on Hierarchy view. Drag and drop the ‘PlaneMaterial’ material you just created on Project view onto ‘Materials > Element 0’ in Mesh Renderer area on Inspector view.
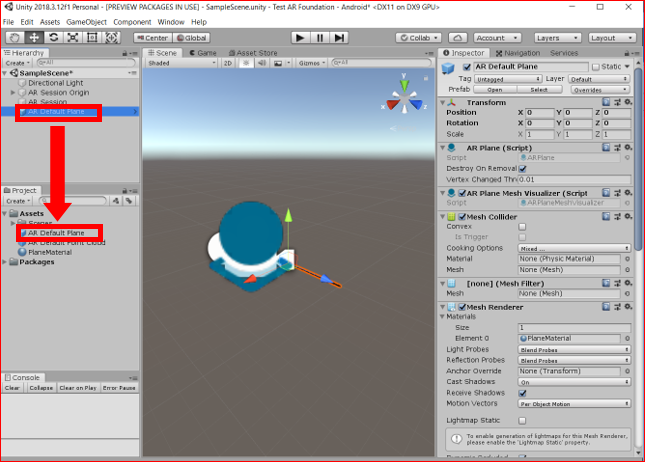
Drag and drop the ‘AR Default Plane’ object on Hierarchy view onto Project view to make it Prefab.
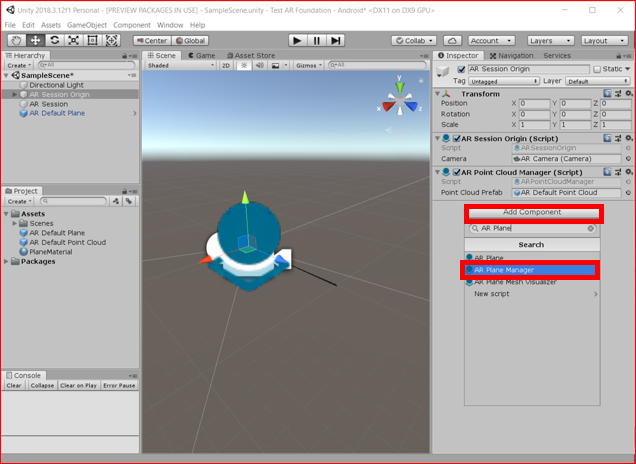
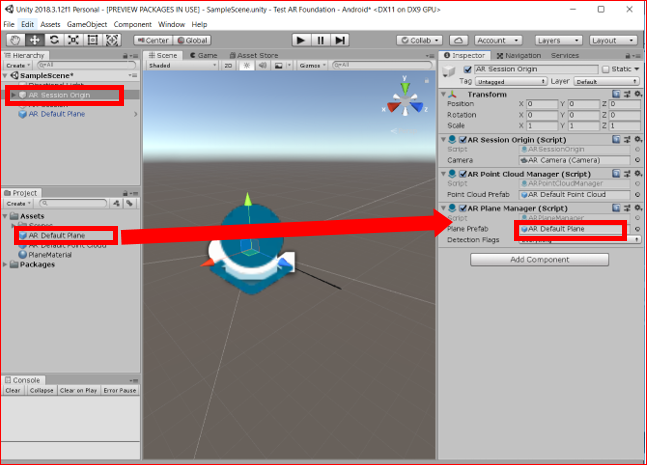
Next, click ‘AR Session Origin’ on Hierarchy view, and click ‘Add Component‘ button on Inspector view. From there, search for ‘AR Plane Manager‘ and add it.
Drag and drop ‘AR Default Plane’ on Project view that has been converted to Prefab just now onto ‘Plane Prefab’ on the ‘AR Plane Manager’ component in Inspector view.
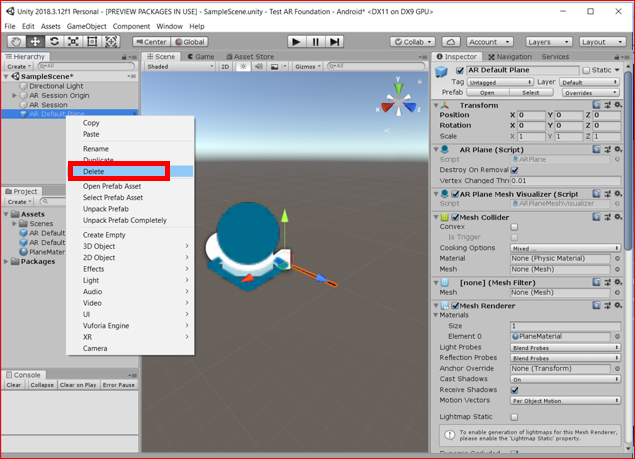
Finally, the object that has been prefab is not necessary on Hierarchy view, so right-click and click ‘Delete‘.
【Step 5: Create C# Script to Display 3D Objects】
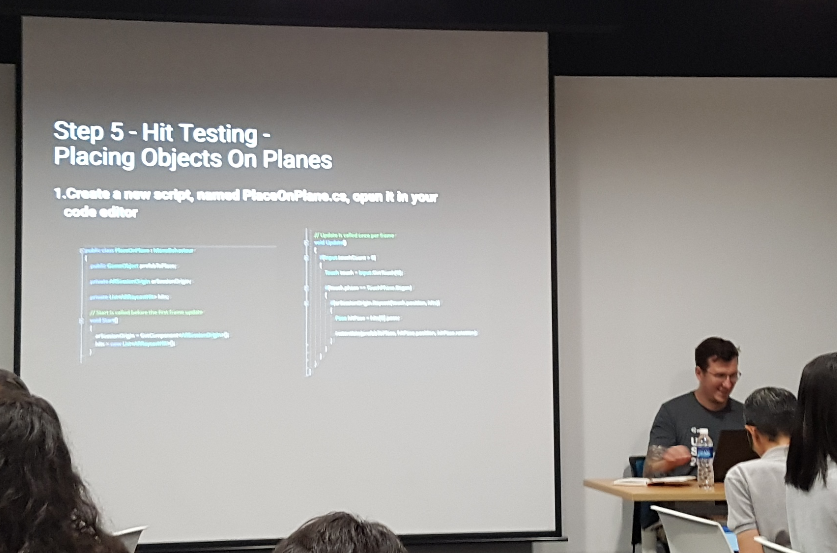
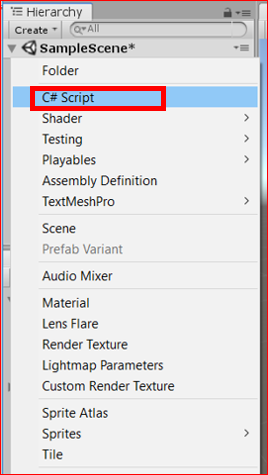
First, create a new C# script. Click ‘Create> C# Script‘ from Project view.
Rename the created C# script here, I will use ‘PlaceOnPlane’.

Double-click this ‘PlaceOnPlane’ to display the script by Visual Studio. And change the script as follows.
using System.Collections;
using System.Collections.Generic;
using UnityEngine;
using UnityEngine.XR.ARFoundation;

public class PlaceOnPlane : MonoBehaviour
{
    public GameObject prefabToPlace;
    public ARSessionOrigin aRSessionOrigin;
    public List<ARRaycastHit> hits;

    void Start()
    {
        hits = new List<ARRaycastHit>();
        aRSessionOrigin = GetComponent<ARSessionOrigin>();
    }

    void Update()
    {
        if (Input.touchCount > 0)
        {
            for (int i=0; i < Input.touchCount; i++)
            {
                Touch touch = Input.GetTouch(i);
                if (touch.phase == TouchPhase.Began)
                {
                    if (aRSessionOrigin.Raycast(touch.position, hits))
                    {
                        Pose hitPose = hits[0].pose;
                        Instantiate(prefabToPlace,
                               hitPose.position, hitPose.rotation);
                    }
                }
            }
        }
    }
}
Save your updated C# script and return to Unity editor.
Click ‘AR Session Origin’ on Hierarchy view, and drag and drop the C# script ‘PlaceOnPlane’ you just created from Project view onto Inspector view.
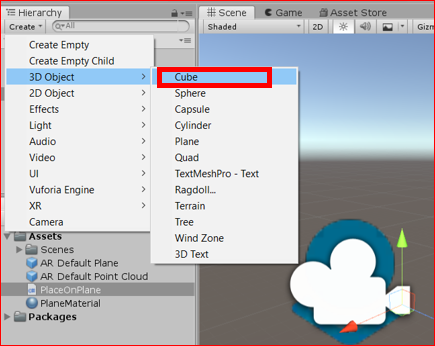
Next, create a 3D model to display in AR. Here I will use a Cube to easily make it.
Click ‘Create > 3D Object > Cube‘ from Hierarchy view.
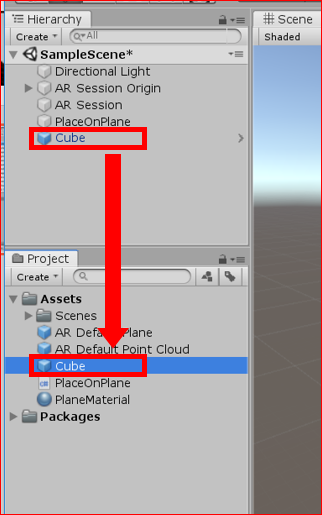
Drag and drop a Cube object created in Hierarchy view into Project view.
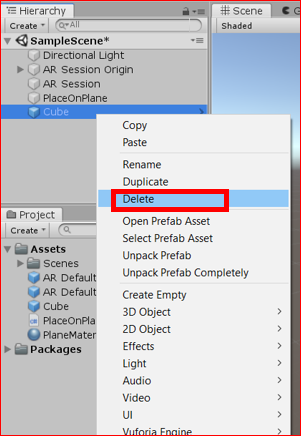
The prefab object is not necessary on Hierarchy view, so right click and click ‘Delete‘.
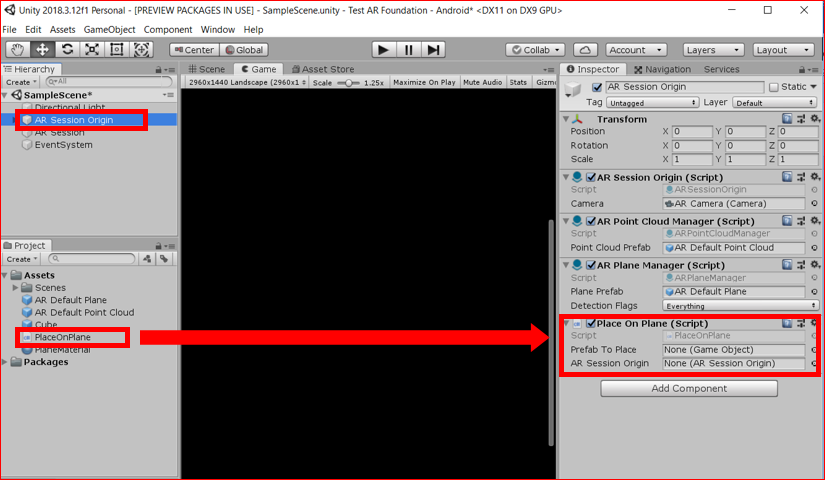
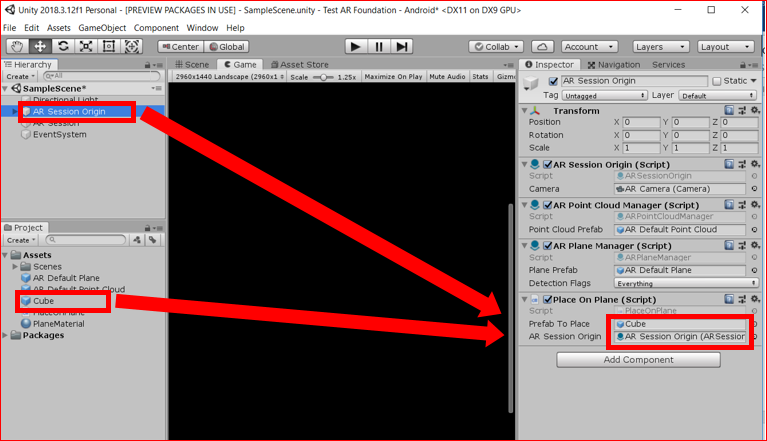
Finally, click ‘AR Session Origin’ on Hierarchy view, drag and drop ‘Cube’ Prefab from Project view to ‘Prefab To Place‘ on the ‘Place On Plane’ area on Inspector view.
Also, drag and drop ‘AR Session Origin’ object from Hierarchy view to ‘AR Session Origin‘ in the ‘Place On Plane’ area.
【Step 6: Test Running on Mobile Device】
Now, you completed to set up AR Foundation, let’s run a test on your mobile device.
First of all, connect the Android mobile device with USB cable.
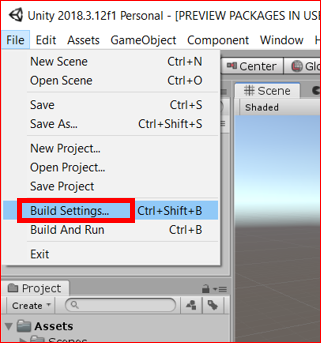
Click ‘File > Build Settings…’ from the menu.
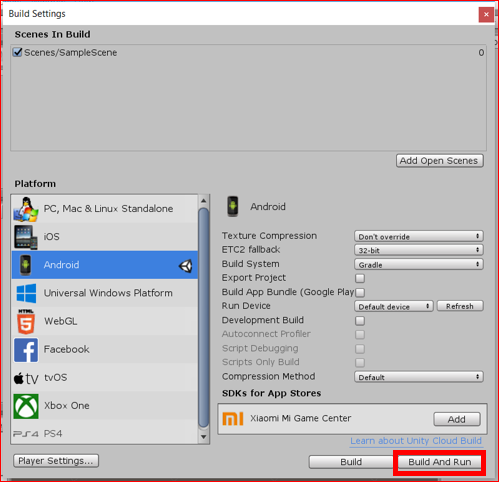
Click ‘Build And Run‘ button from ‘Build Settings’ screen.
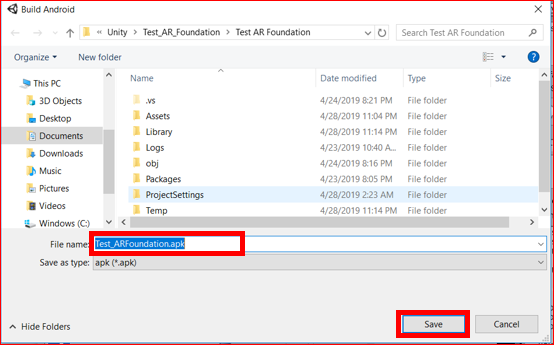
Then, input screen of apk file name is displayed. You can put any name there. Click ‘Save‘ button.
Then, the build and the installation on the Android device will begin.
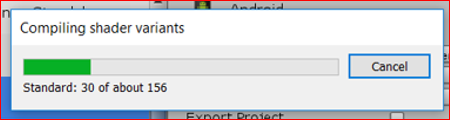
AR application will be launched automatically after installation.
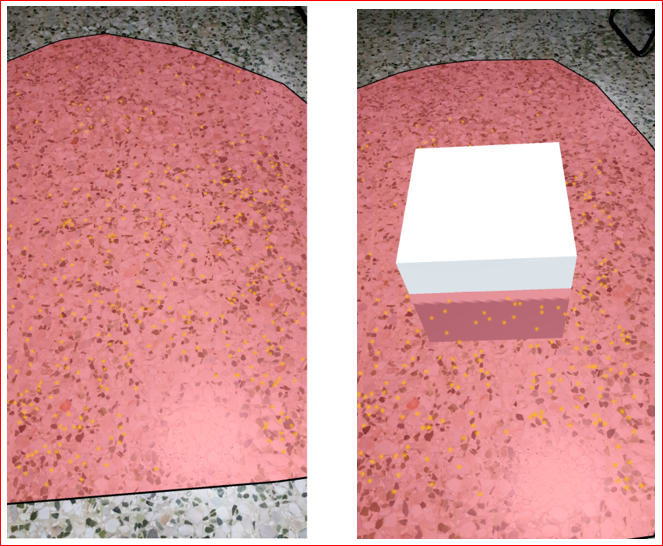
Move the mobile device’s camera towards the floor in a circular motion. Then, the floor is recognized, yellow dots are displayed as the feature points, and a translucent red plate is displayed on the floor surface.
Let’s tap the floor that has been recognized and turned red. AR object, white cube will appear.
【Additional】
Currently, the 3D object is just a white cube, but any 3D object can be used as an AR object if you want to change it to your own favorite one.
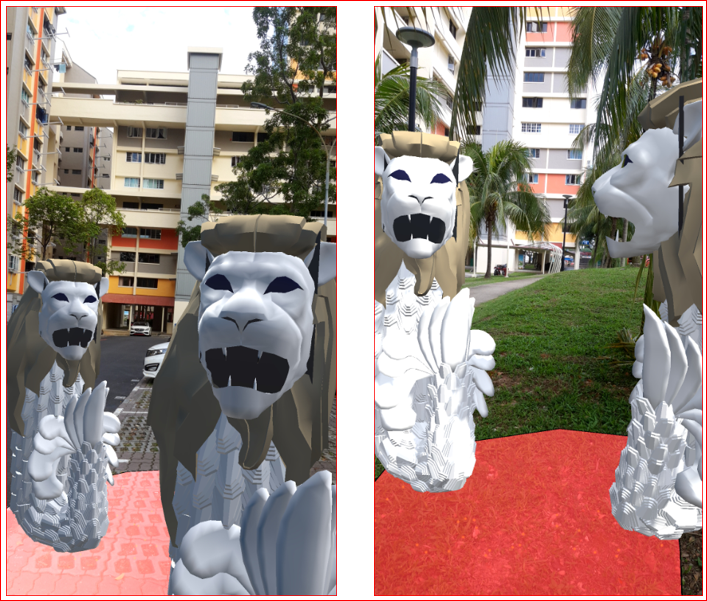
This time, I changed to 3D model of Marlion in Sentosa Island in Singapore that I created before.
The first photo of this article and the following photo are that. I took it in front of my house, but it has become a little scary, looks like the space monster Merlion…

【 Original Japanese Site: http://blog.lab7.biz/archives/18013442.html 】