

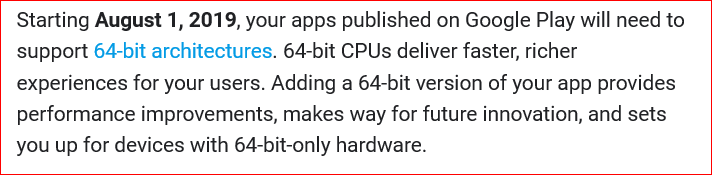
I think that the above email have arrived from Google to many companies and individuals who have released Android apps.
In short, if you are releasing a 32-bit version of an app, updating to the app after August 1 will only be approved for the 64-bit version.
At the time of the release of this article, the August 1 has already passed. However I also supported my game app to 64-bit recently, so I will share how to apply it this time. (You can update your app after August 1.)
By the way, all my game apps are developed with Unity, so this explanation is for Unity.
(This article is based on the following Android Developers site.)
https://developer.android.com/distribute/best-practices/develop/64-bit
And on this Android Developers site, they have announced the following about 64-bit support.
【Overview】
Follow the steps below to support 64-bit.
- Check Unity Version
- Set Player Settings
【1. Check Unity Version】
On the Android Developers site, there is a 64-bit correspondence table for Unity like below. Unity2019.1 has already been released, but of course the new version is also supported.
Please check the Unity version of your app.
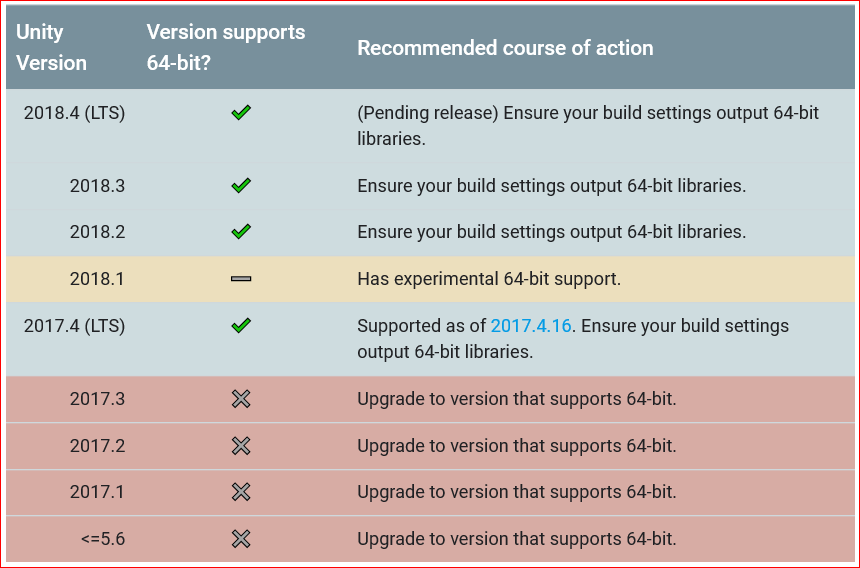
My game app used Unity 2018.2. Therefore, the following explaination describes the 64-bit support steps for Unity 2018.2. (Basically, if your Unity version supports 64-bit, the operation will be same.)
If you are using Unity that does not support 64-bit, you firstly have to upgrade to the version of Unity that supports 64-bit.
【2.Set Player Settings】
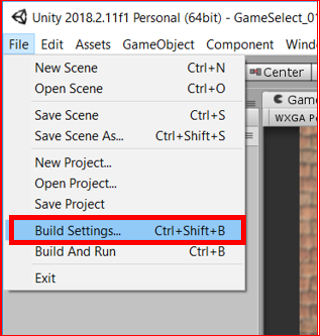
Open the target app project in Unity.
File > Build Settings…
By above, display Build Settings screen.
By above, display Build Settings screen.
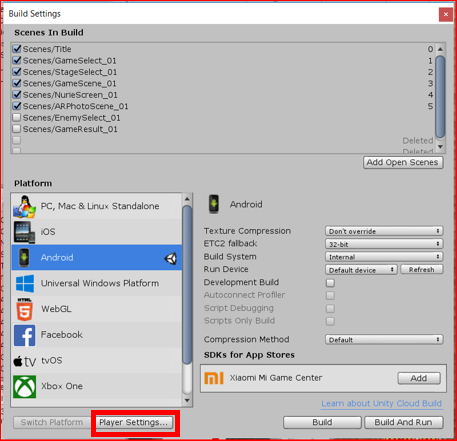
Click the ‘Player Settings’ button to display Player Settings screen in Inspector view.
(As I am talking for Android, it is assumed that the platform has been already changed for Android.)
(As I am talking for Android, it is assumed that the platform has been already changed for Android.)
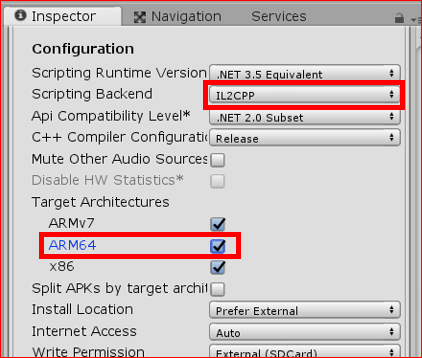
Check the Configuration area of ‘Other settings’ in ‘Player Settings’.
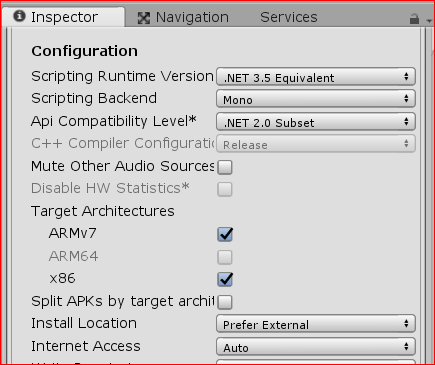
Change the following parts:
- 【Scripting Backend】:Set to [IL2CPP].
- 【Target Architectures】:Select the [ARM64] check box.
【3. Test on actual device】
Since the setting is complete, we will test it with the actual device.
File > Build Settings…
Display Build Settings screen.
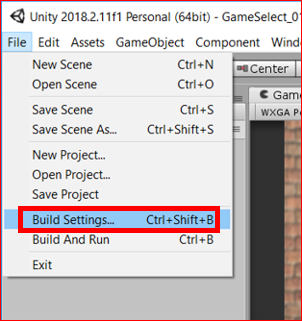
Display Build Settings screen.
As usual, connect the actual device via USB and click ‘Build And Run’.
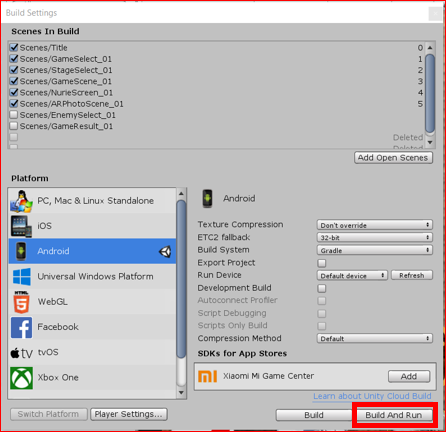
After the build, the app will be automatically installed and launched on your smartphone.
If there is no problem after testing, release again from Google Play Console.
If there is no problem after testing, release again from Google Play Console.
【Additional. Error handling during build】
In my environment, the following error occurred when building.
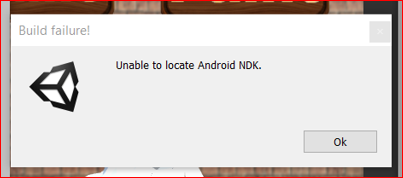
It is said that NDK is not found. This NDK is required to use IL2CPP with Unity. It seems I haven’t set it before.
However, this time, it is mandatory for 64-bit support.
However, this time, it is mandatory for 64-bit support.
To set up NDK, first download the file from:
Unzip the downloaded ZIP file.
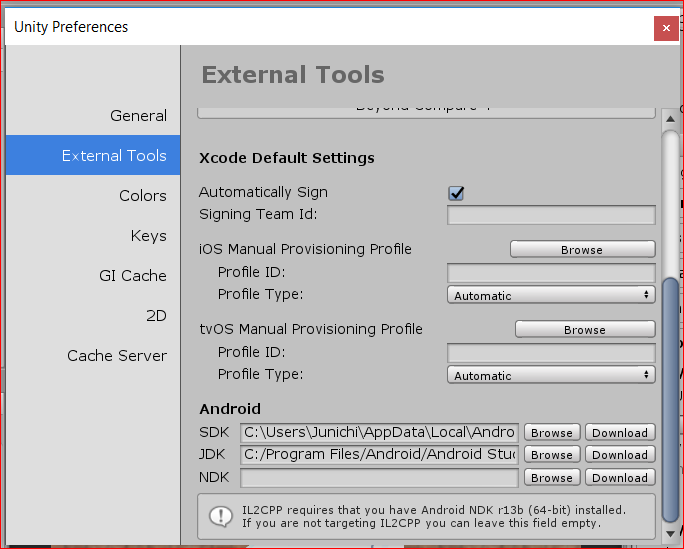
From the menu below, display the External Tools screen.
From the menu below, display the External Tools screen.
Edit > Preferences > External Tools
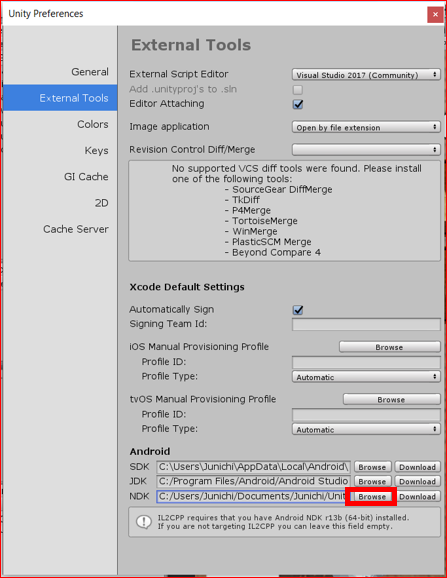
Click the ‘Browse’ button on the Android NDK and select the folder where the NDK is unzipped.
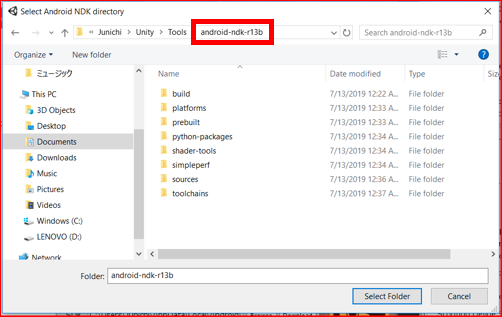
Then this resolves the error.