
Regarding ML-Agents which is Unity plugin to realized Machine Learning environment in Unity, already some demos have been shown in sessions held in Unite and some events.
I also introduced about those sessions some times.
[Link: Unite 2018 Tokyo: Introduce about “Unity for Deep Learning: Tool kit: ML-Agents”.]
[Link: ]
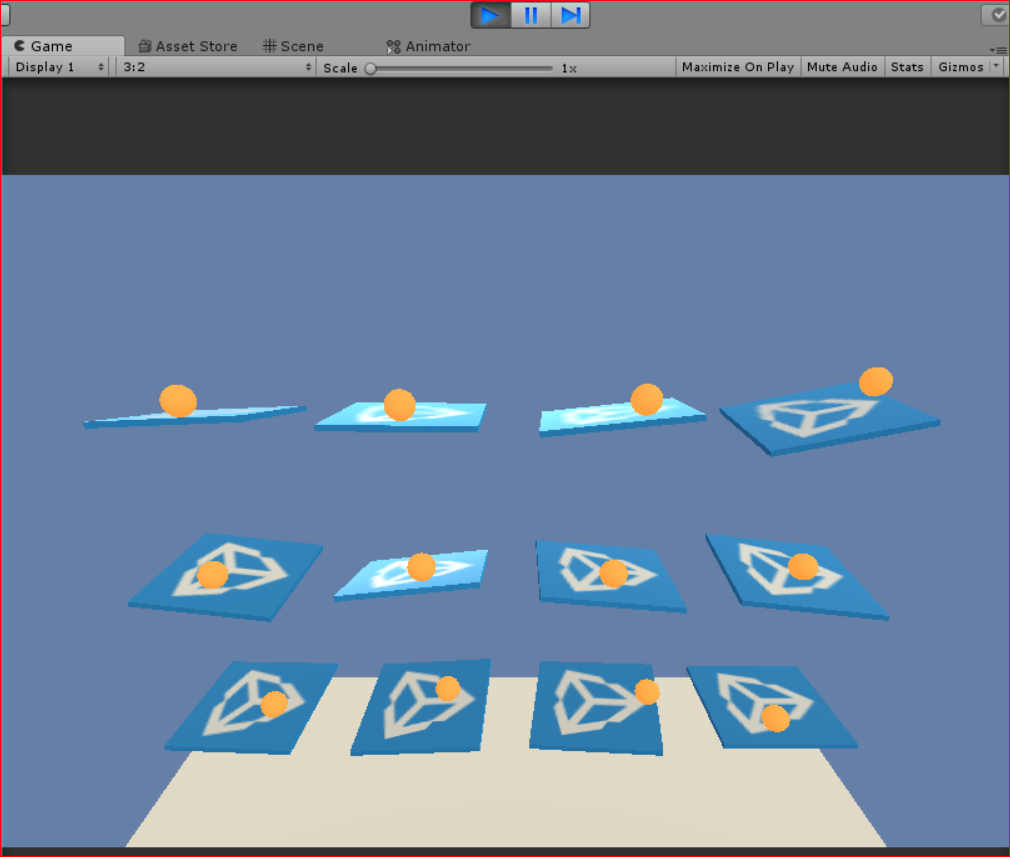
In those demo, there is a sample demo which is used every times. The name is 3Dball.
This time, I’ll introduce how to use the demo by yourself in your Unity. (Firstly I tried it using sample learned model, then next tried machine learning itself.)
[Overview of the operation steps]
1. Create Python environment
1.1. Install “Anaconda”
1.2. Download Unity Machine Learning Toolkit “ML-Agents”
1.3. Install Python environment
2. Make machine learning environment in Unity
2.1. Open ML-Agents project in Unity
2.2. Import “TFSharpPlugin” into Unity
2.3. Set up ML-Agents project
3. Try to play 3Dball
3.1. Try to play by yourself
3.2. Try to use sample learned model
[Used software version]
– Wiindows10
– Unity 2017.4
– ml-agents 0.4
– Anaconda5.2 (Python 3.6)
[1. Create Python environment]
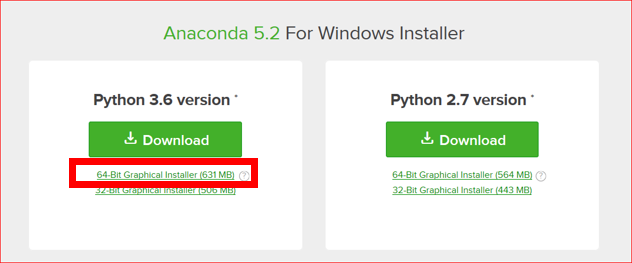
1.1. Install “Anaconda”
Firstly need to install “Anaconda” which is tool to install Python package very easily. (Python is necessary for running TensorFlow.) You can download the installer from following link.
[Link: https://www.anaconda.com/download/]
After downloaded it, run the installer. You can proceed the installing to select ‘Python3.6 version Download 64-Bit Graphical Installer’ on following screen.
1.2. Download Unity Machine Learning Toolkit “ML-Agents”
Unity “ML-Agents” is released form GitHub. You can get from following link.
[Link: https://github.com/Unity-Technologies/ml-agents]
This is GitHub, so you can get it by Clone, but here, I’ll explain about easy downloading way. To download from GitHub, you can download ml-agents ZIP file by ‘Clone or download > Download ZIP’.

After downloading, extract the ZIP file at a place where Unity can connect.
1.3. Install Python environment
Open “Anaconda Prompt” just now installed.
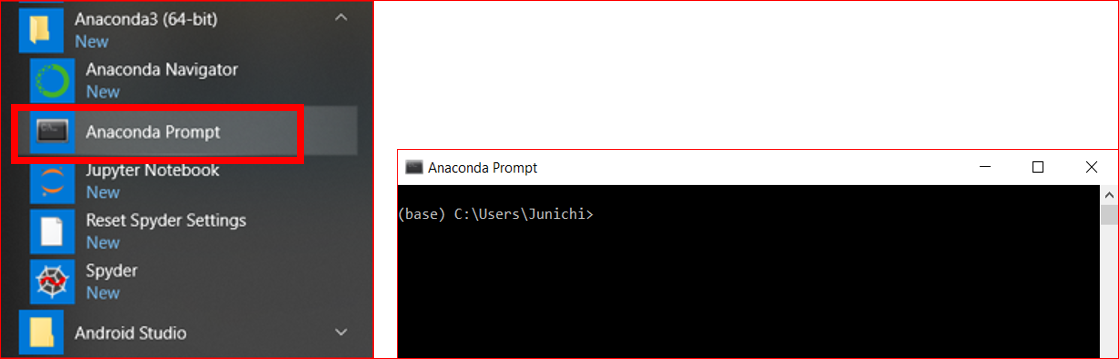
Depending on your character codes, there is a possibility to face to some errors, so it’s better to change character code to UTF-8 like following.
chcp 65001

Move to a folder you extracted ‘ml-agents-master’ just now. To move folders, copying folder path from file explorer is very easy.

cd <paste folder path>

Next, create Python environment for ml-agents.
conda create -n ml-agents python=3.6.3

And change the environment for ml-agents.
activate ml-agents

Install Python.
cd python
pip install .

OK, finished creating Python environment process.
I’ll introduce the next process in next post.
[Link: I tried 3DBall sample of Unity “ML-Agents” (Using sample learned model) Part2]
[Original Japanese Site: http://blog.lab7.biz/archives/11100288.html]